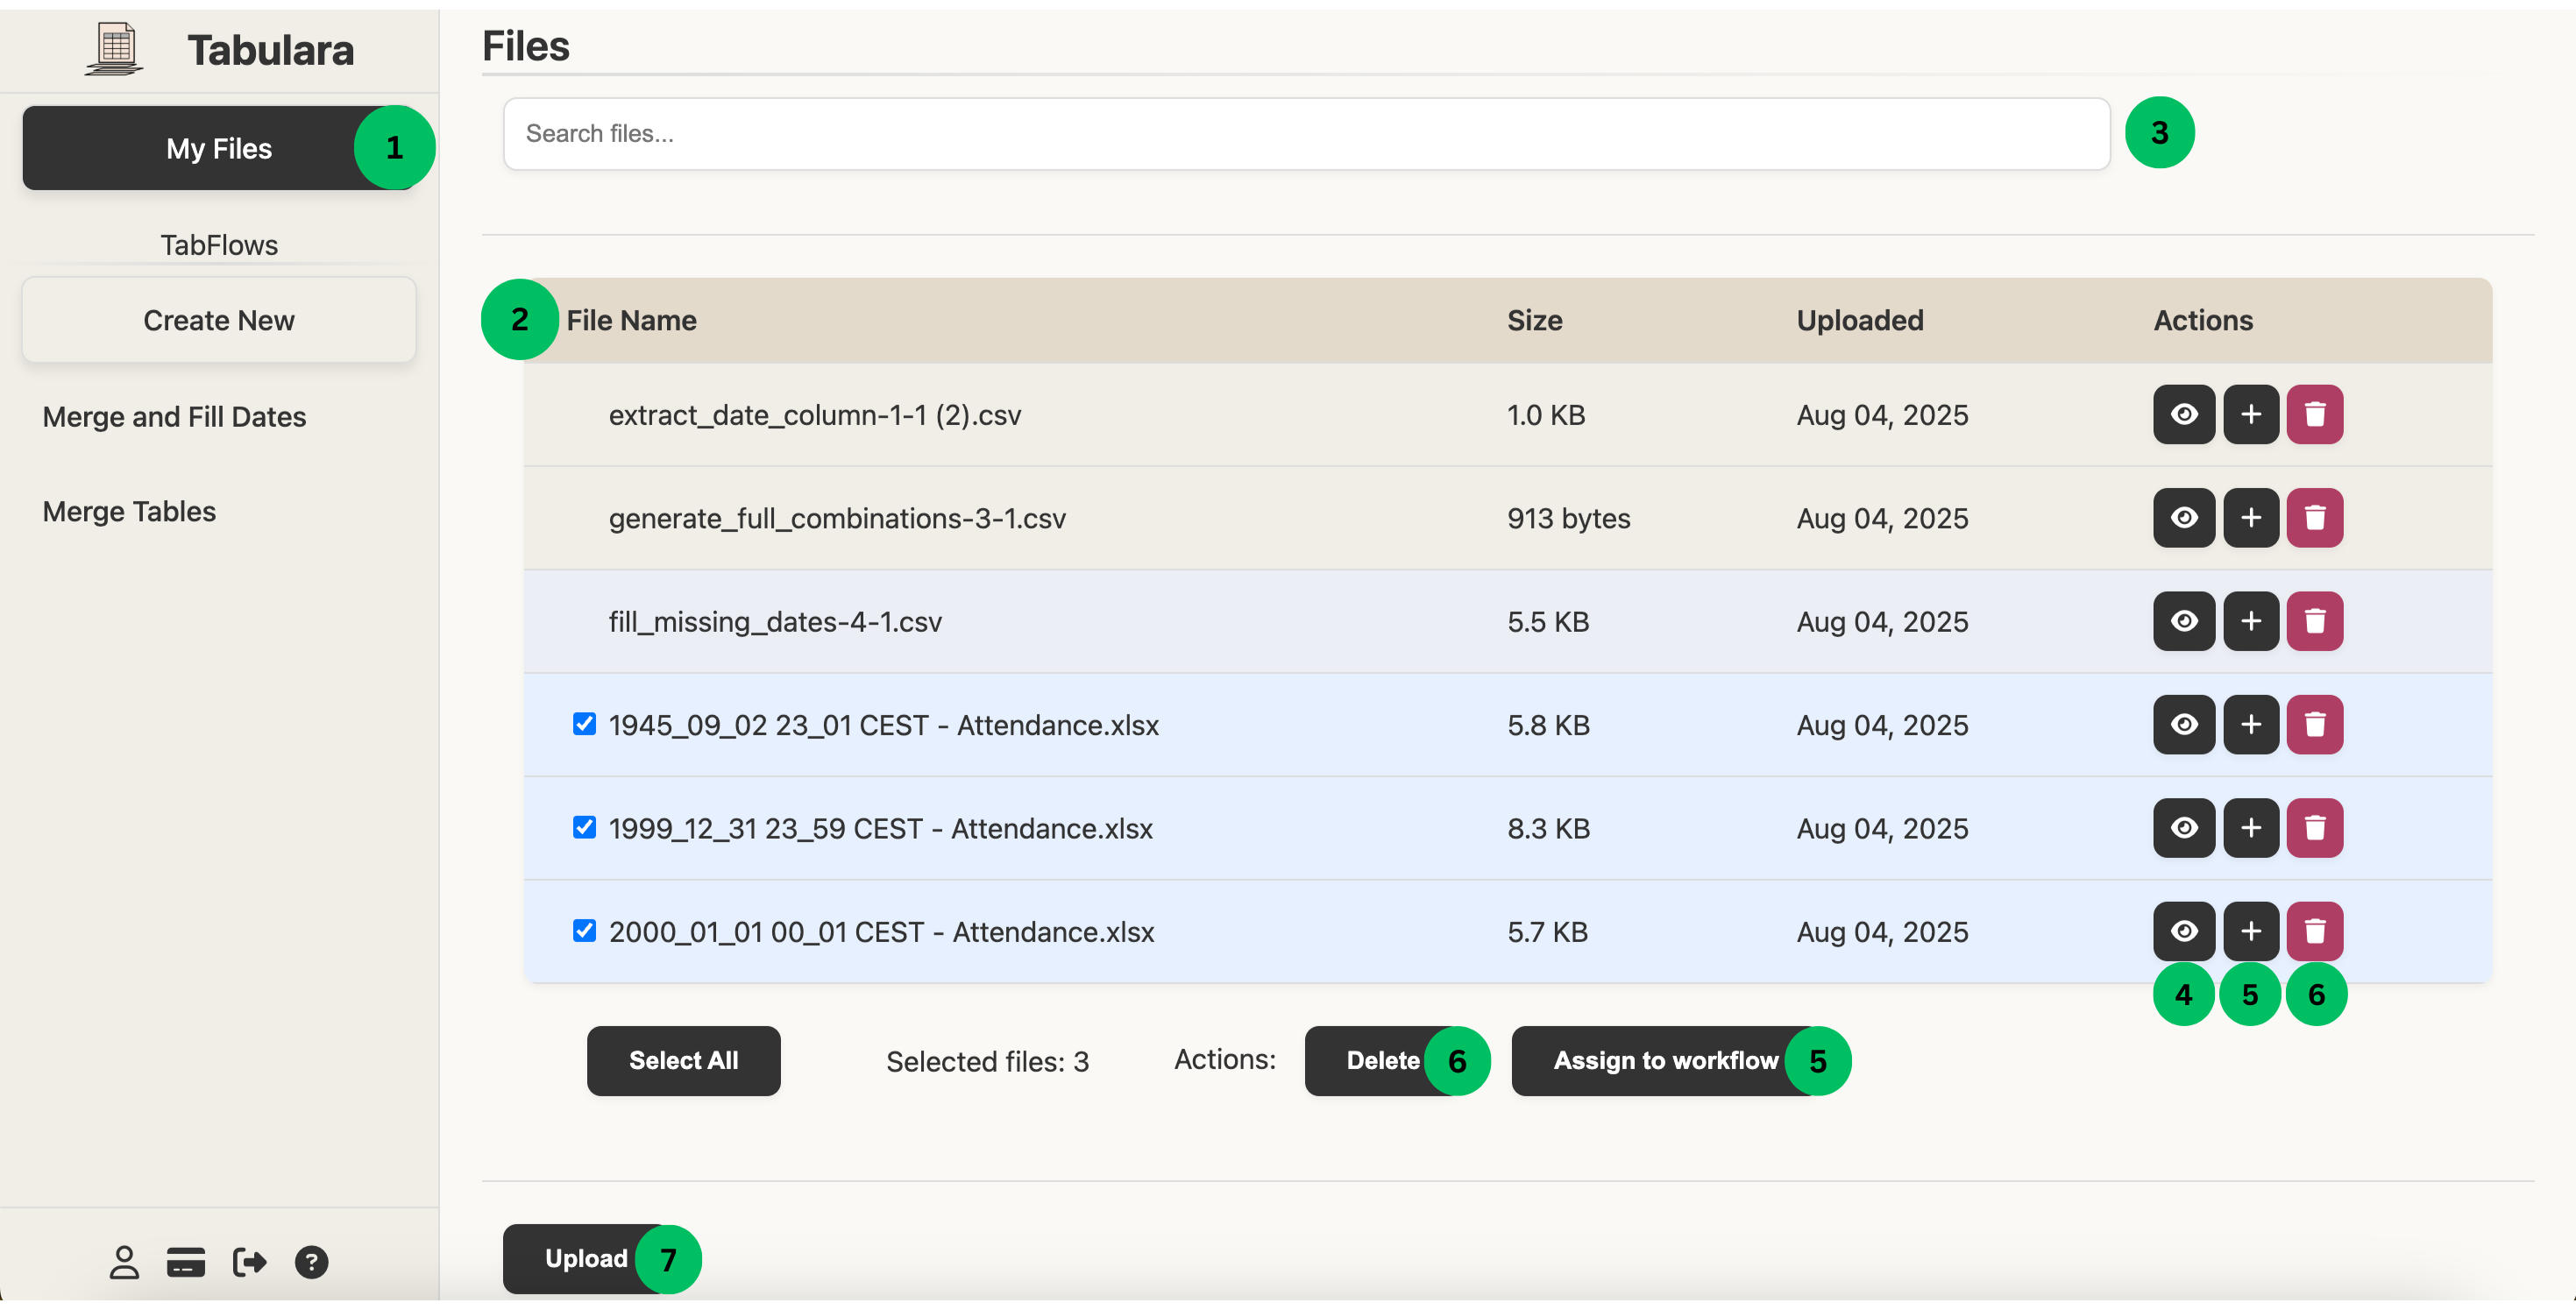
Tabflows
Create a Tabflow
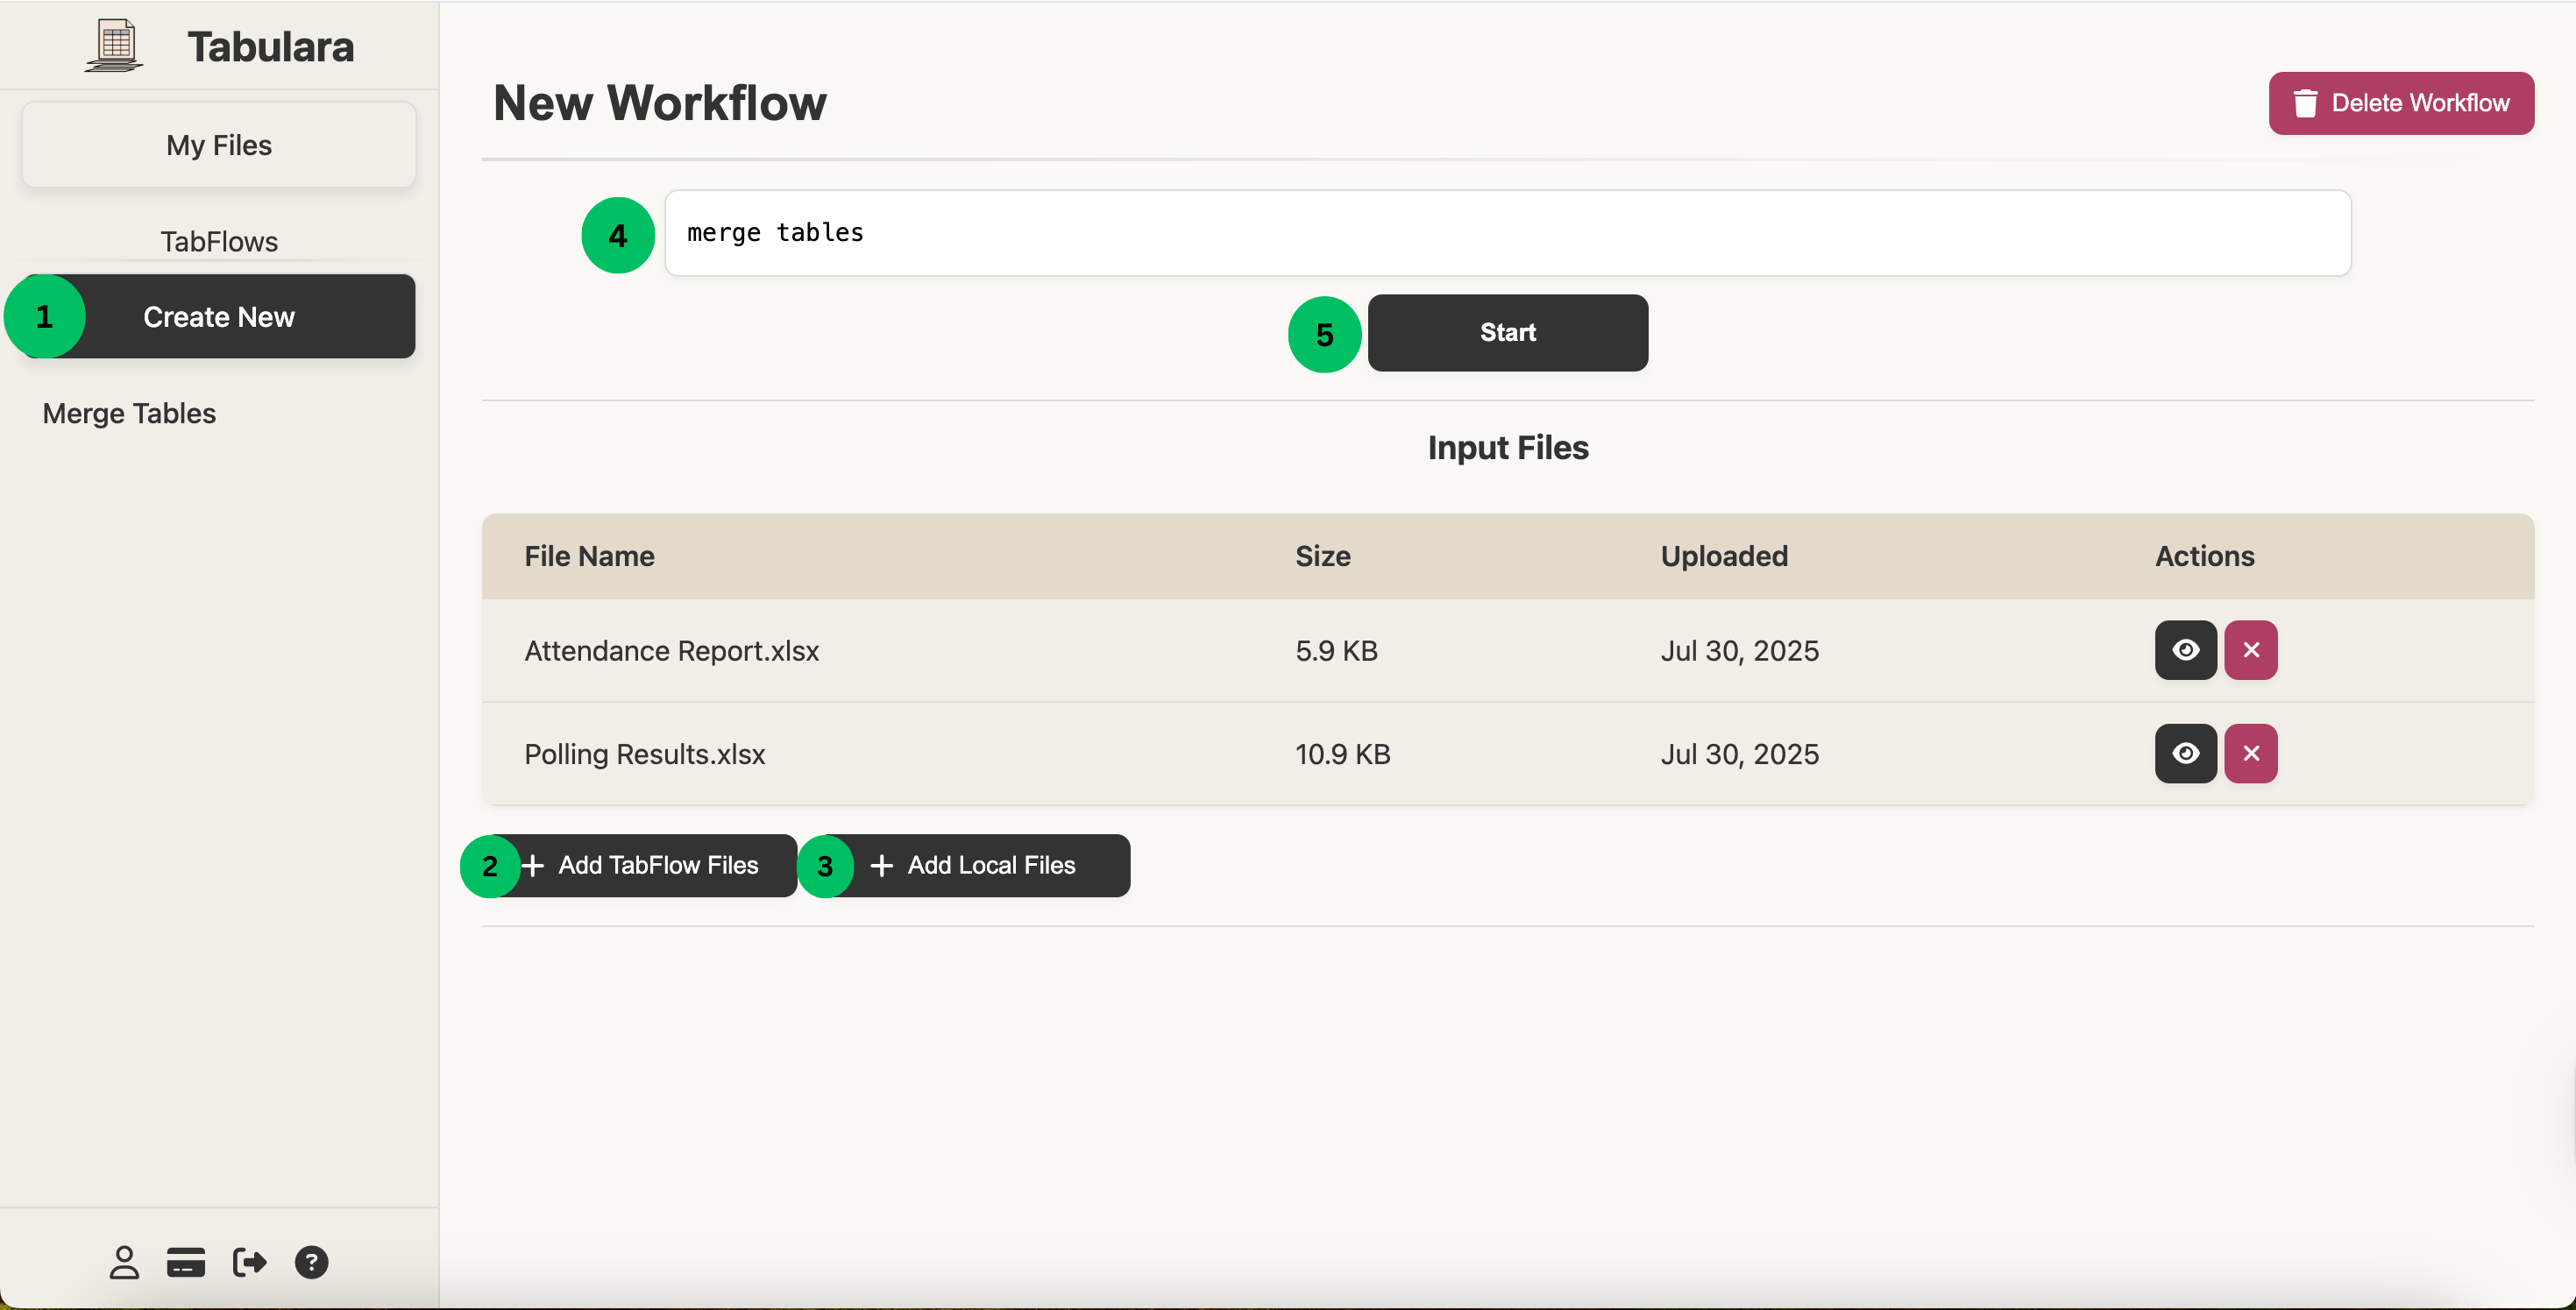
- Click the New workflow button in the left navigation panel to start creating a new Tabulara workflow.
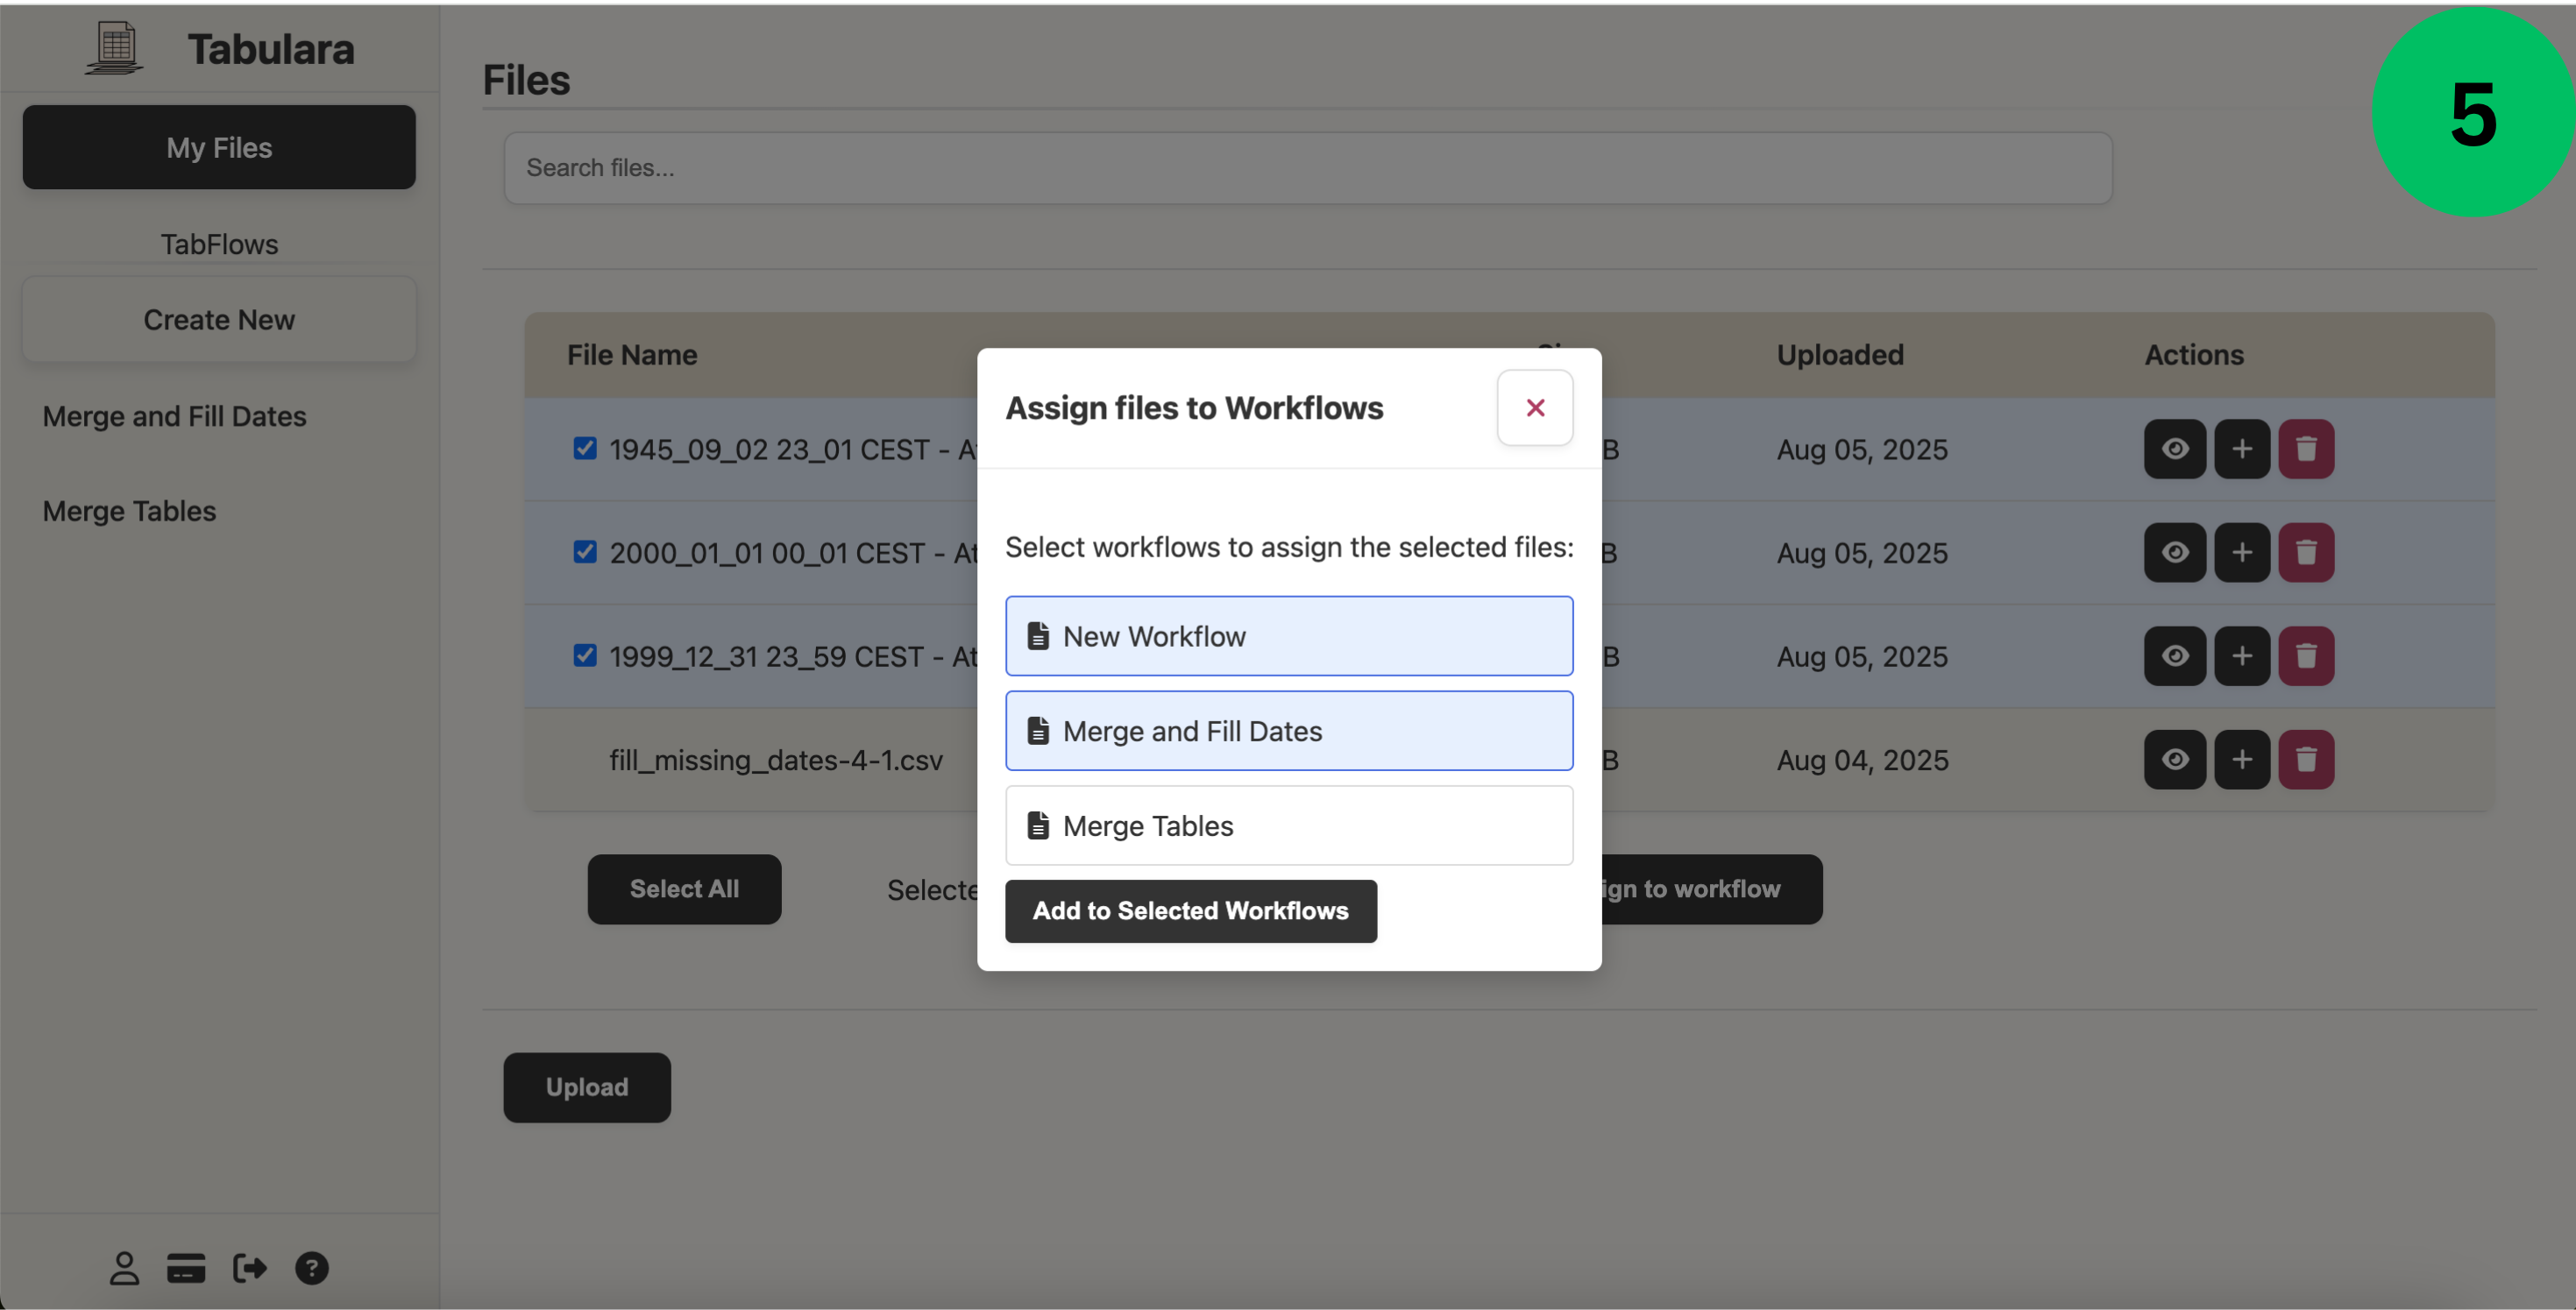
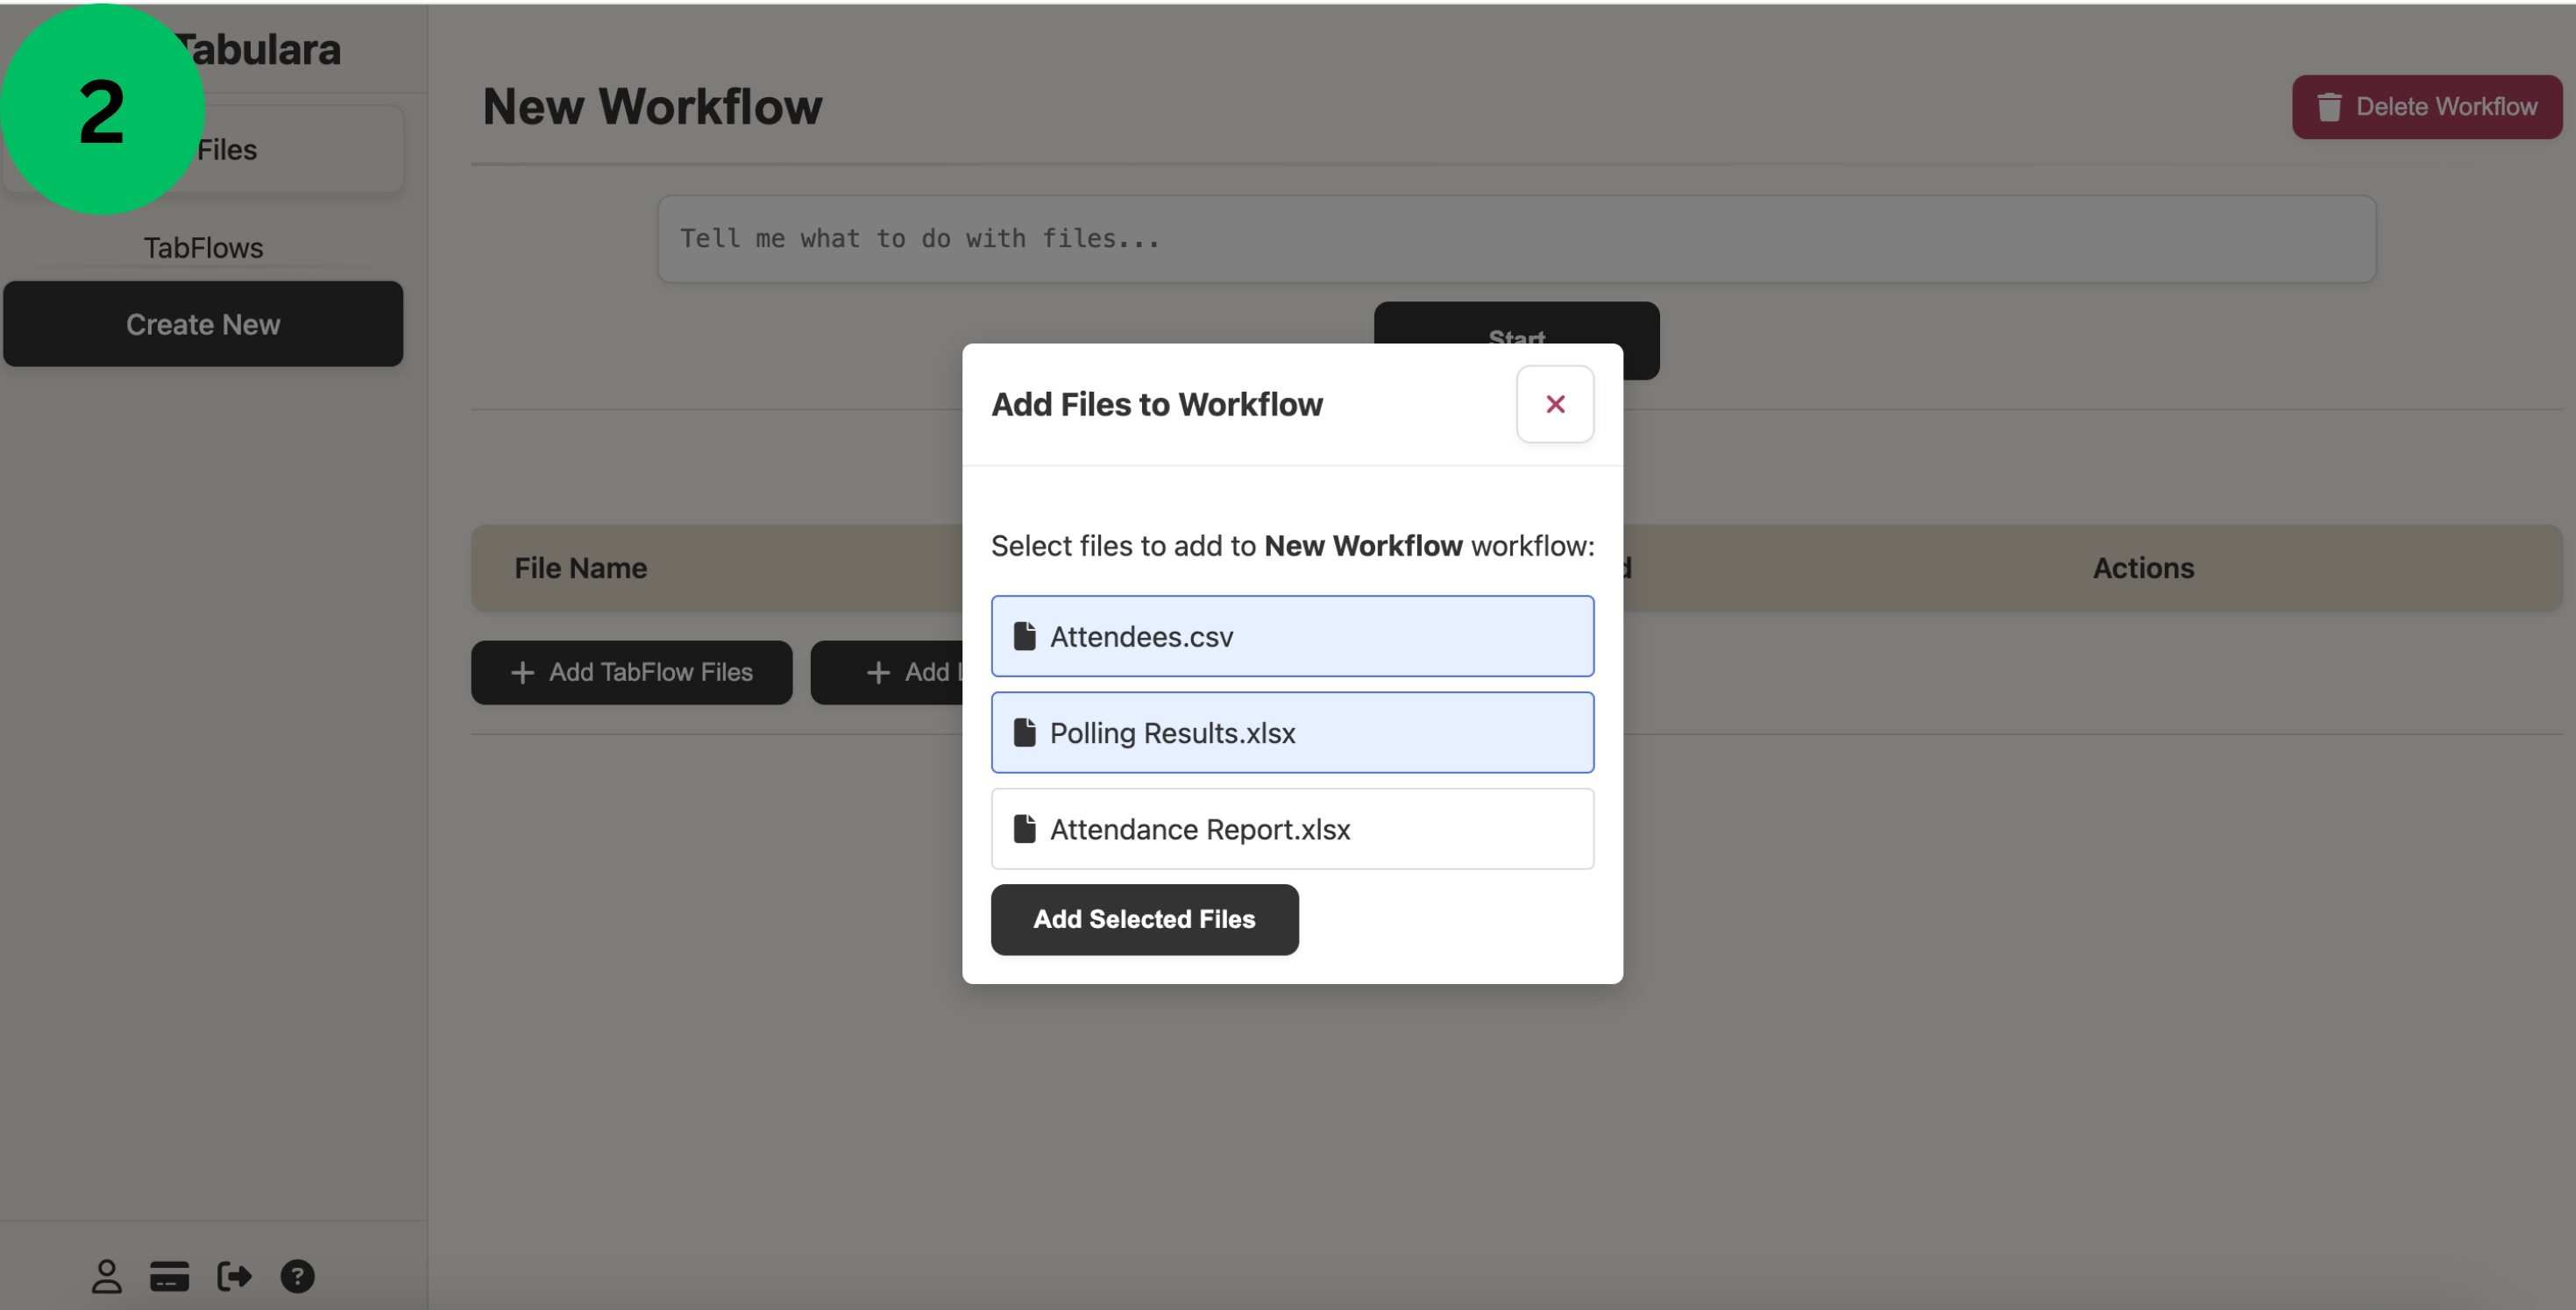
- Add files from your existing Tabulara files library by clicking Add Tabulara files - this opens a selection dialog where you can choose multiple files from your saved collection.
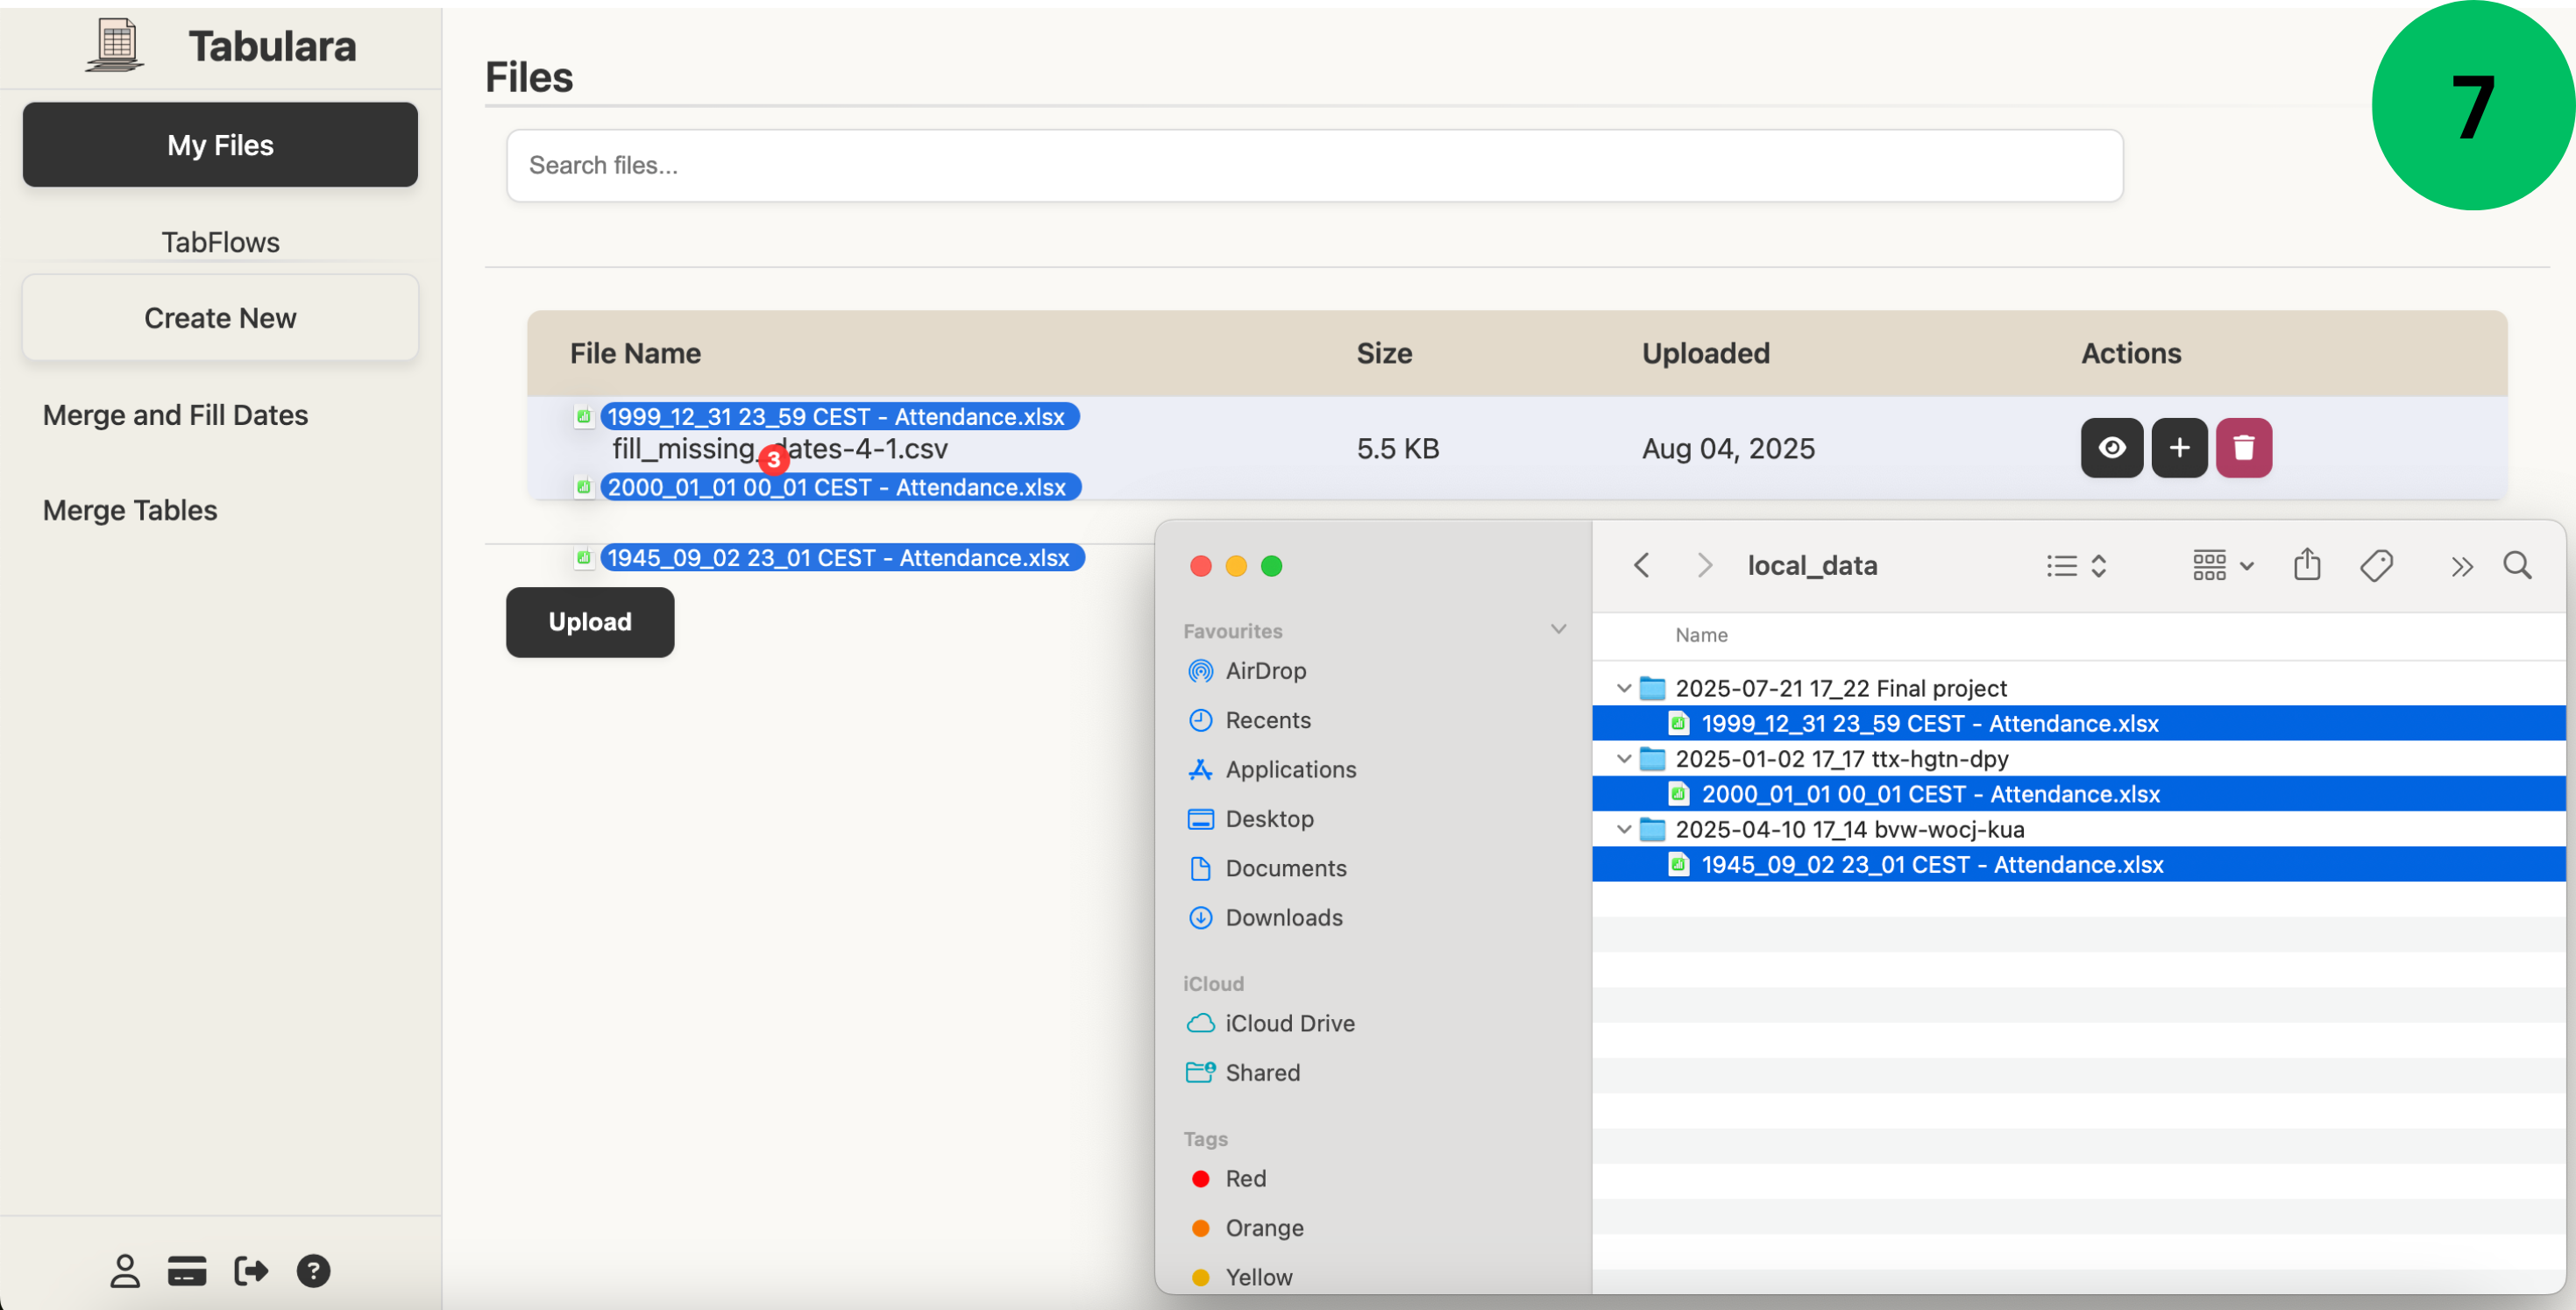
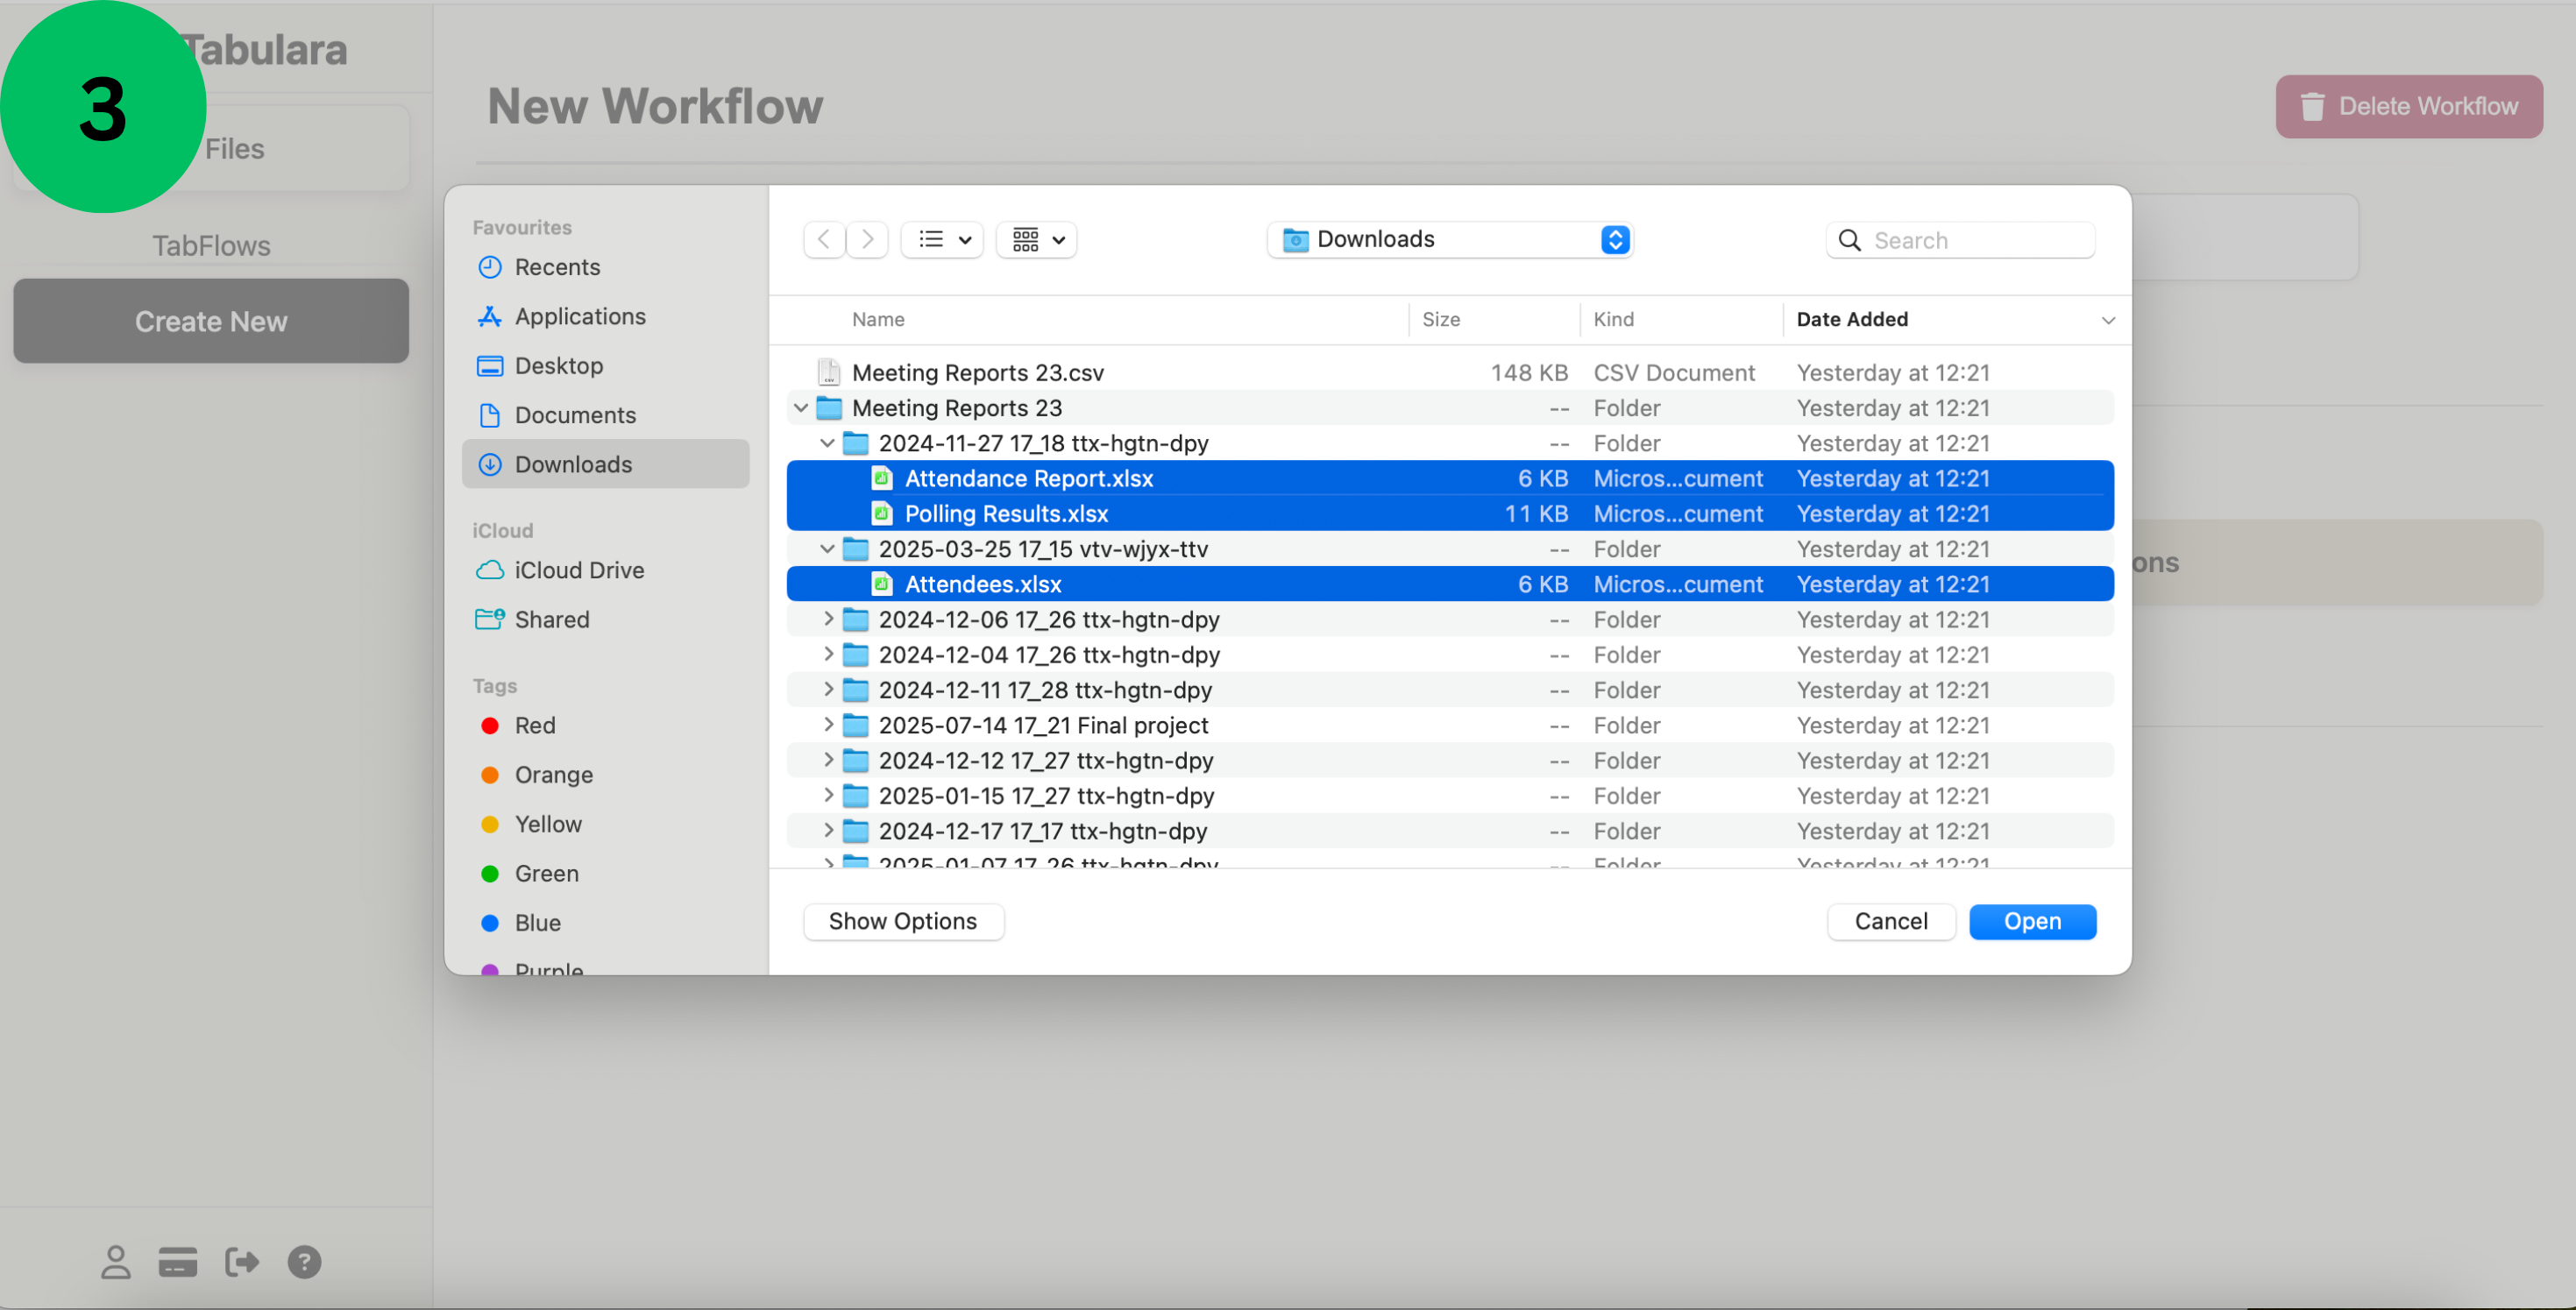
- Upload new files directly from your computer using the Add Local Files button. Files uploaded this way are automatically saved to your Tabulara files library for future use.
- Describe what you want to accomplish with your files using natural language in the command input field - be specific about the data processing or analysis you need.
- Click the Start button to begin processing. The AI will interpret your instructions and generate the appropriate Python code and processing steps to complete your task. This will consume your workflow compilation credit.
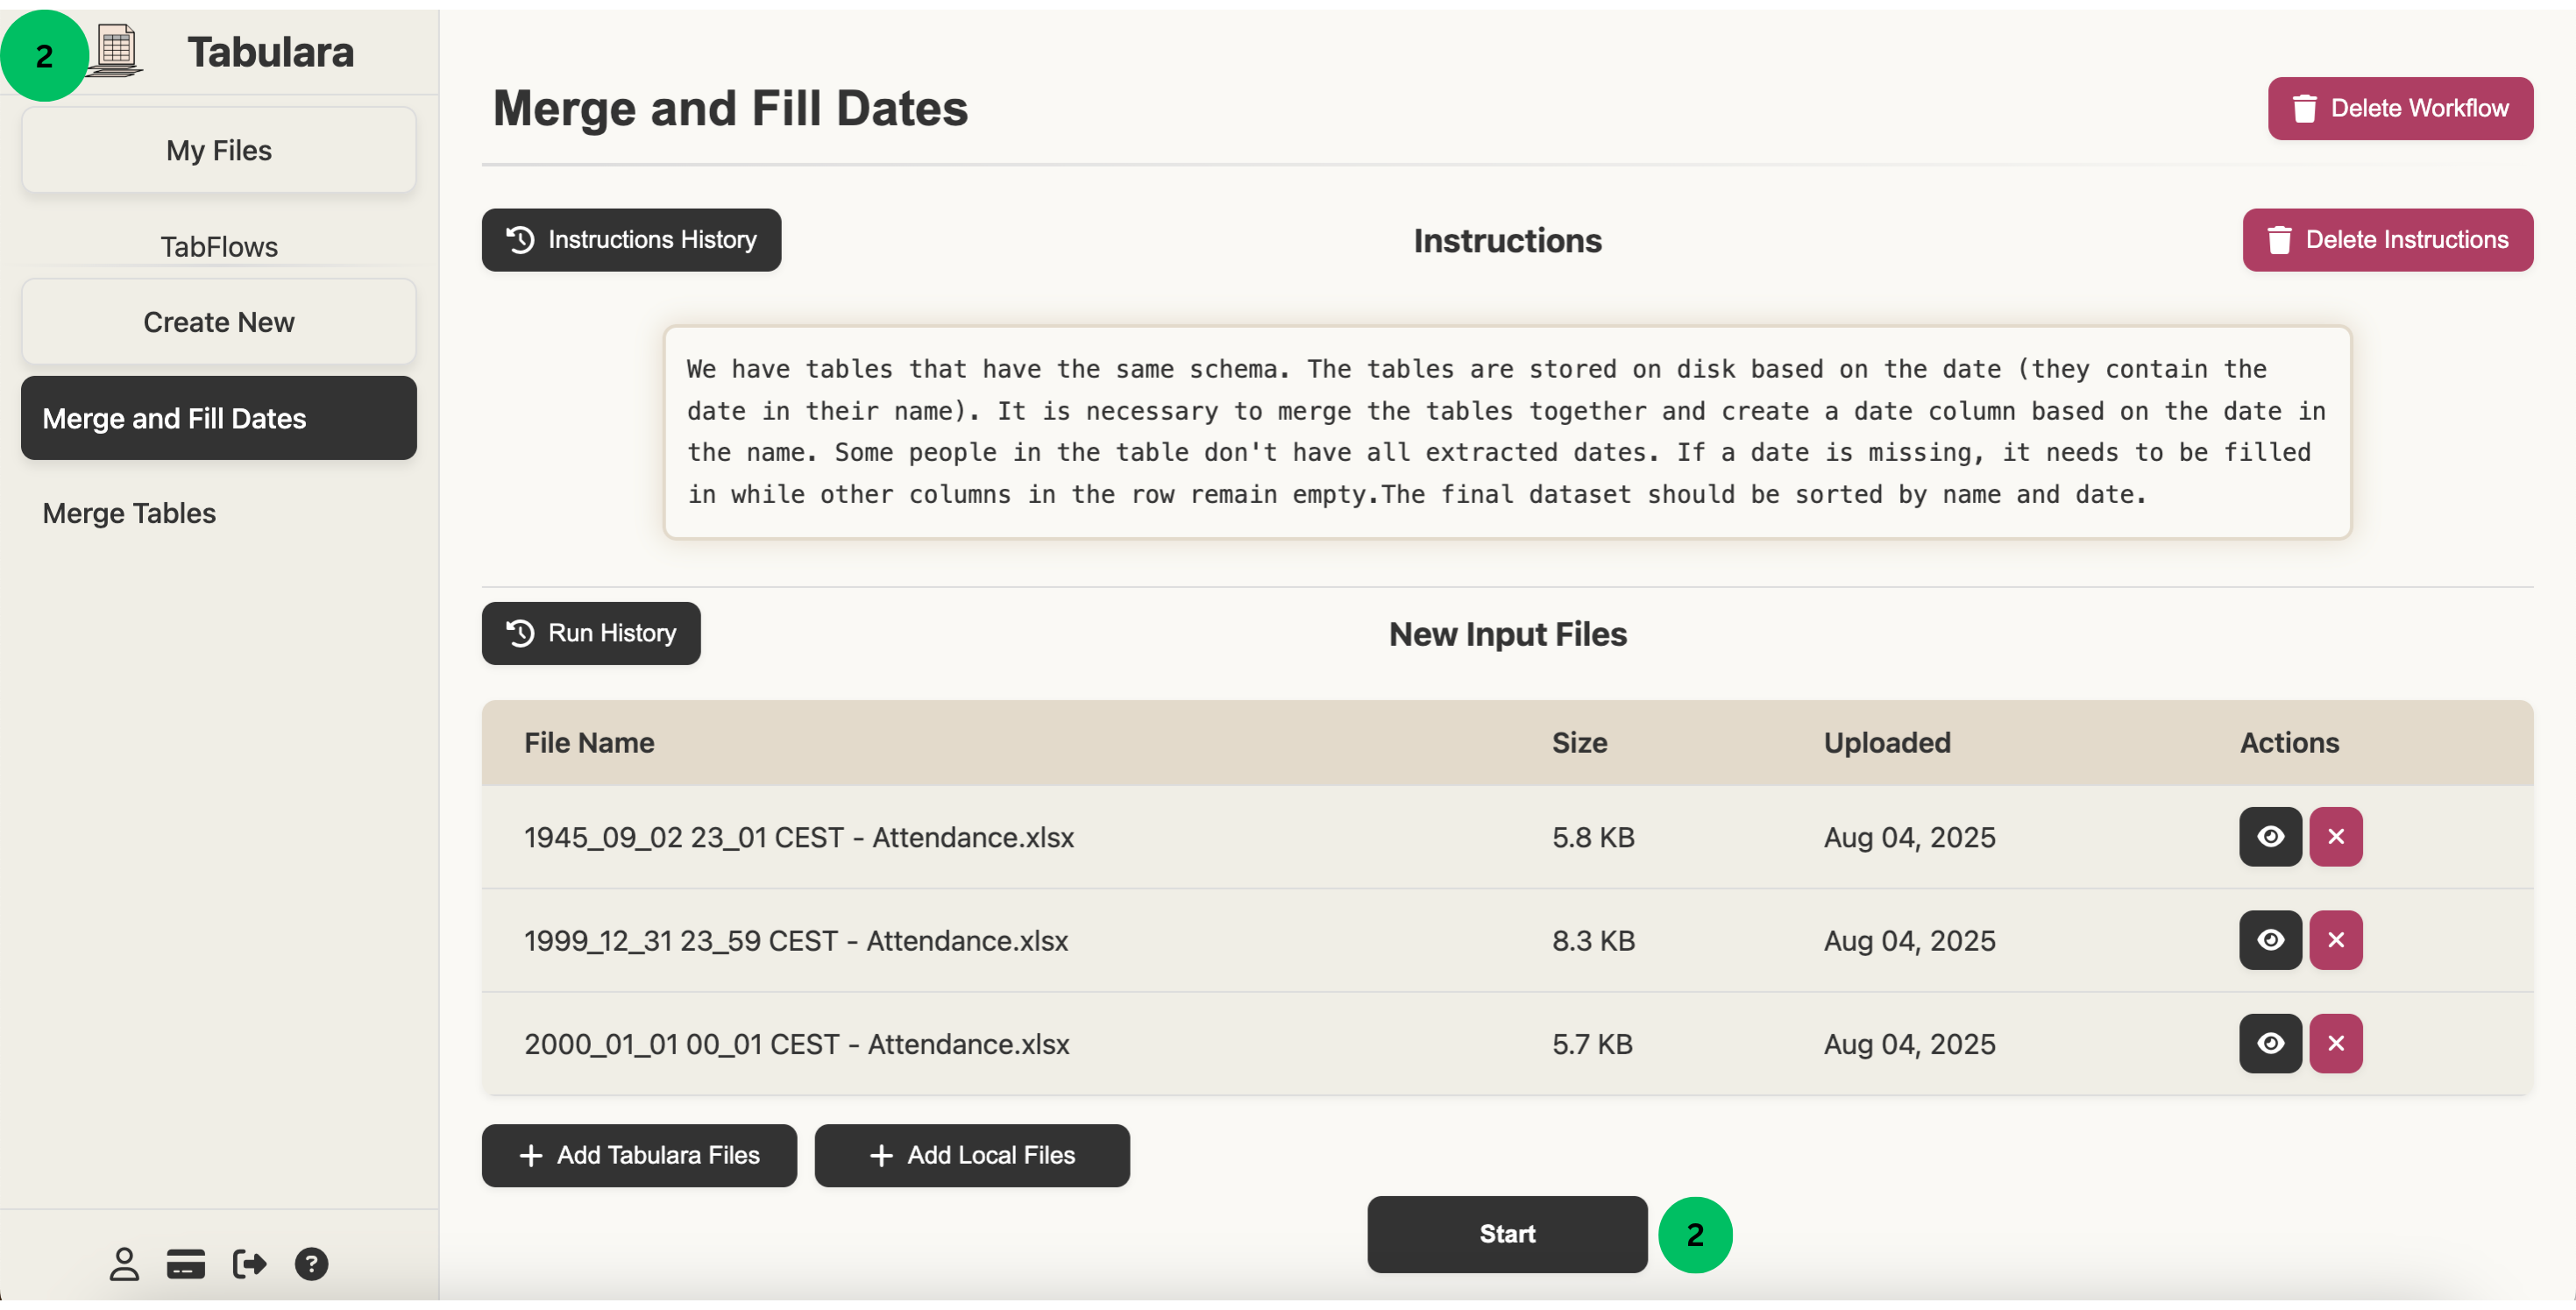
Tabflow results
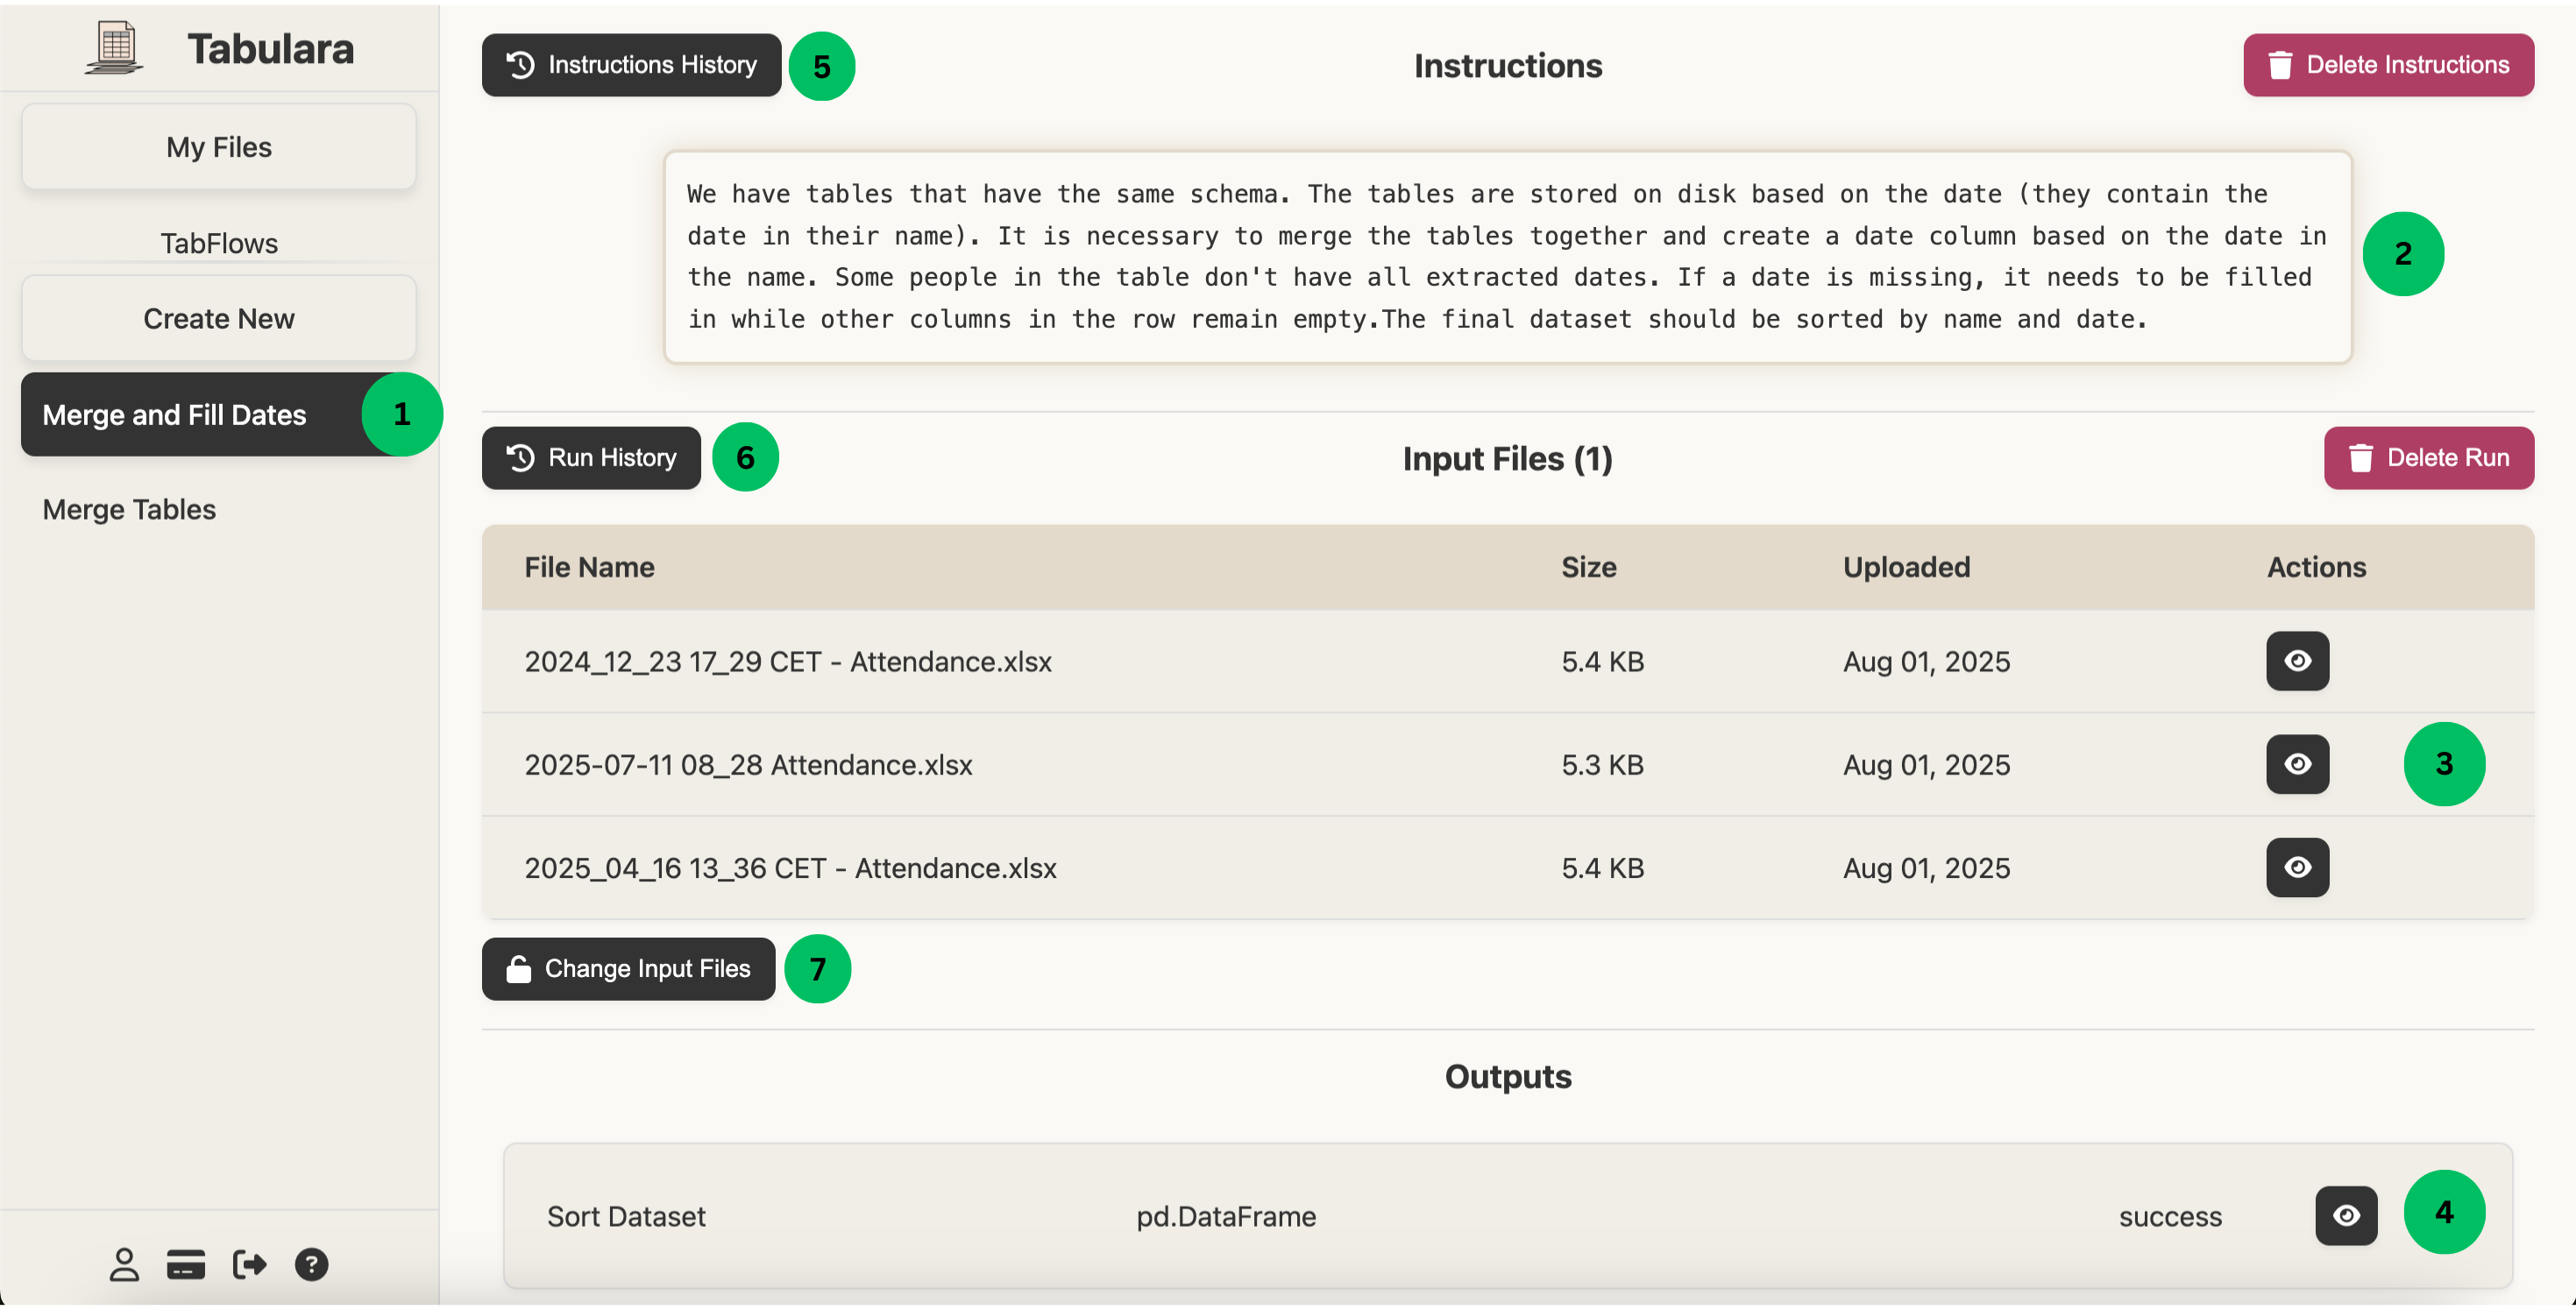
- Switch between your different TabFlows using the navigation panel on the left side of the screen.
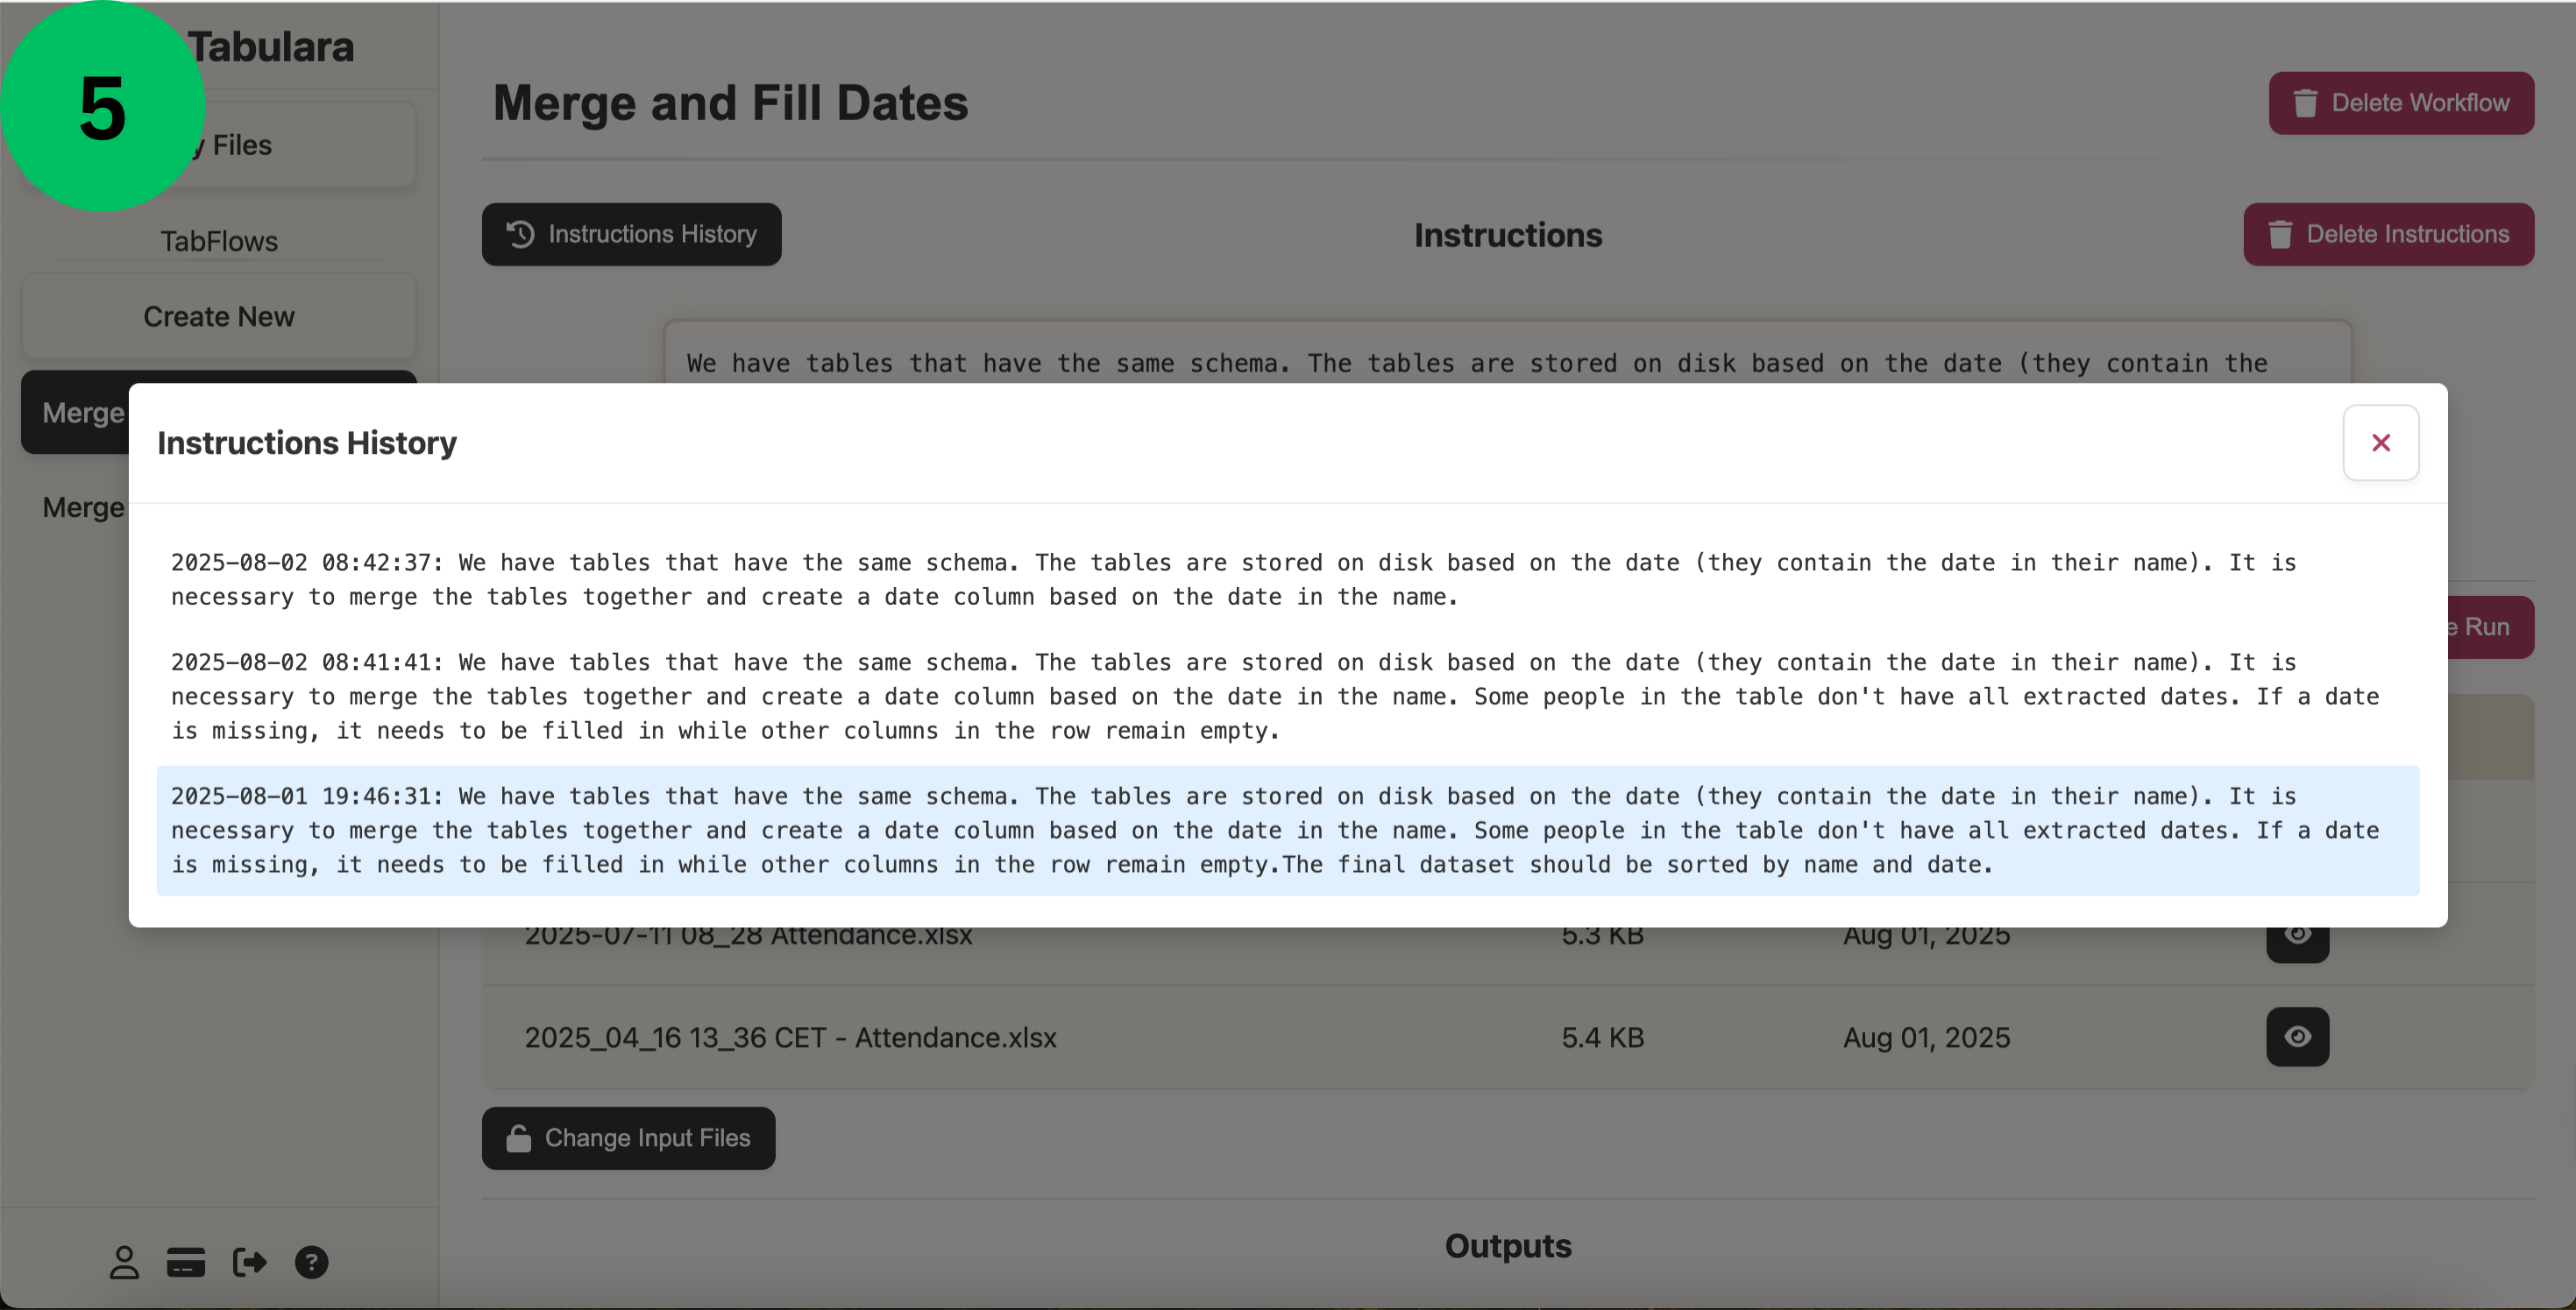
- View and edit your processing instructions here. Click on any instruction text to modify it and create new processing steps. Each TabFlow can contain multiple instruction sets.
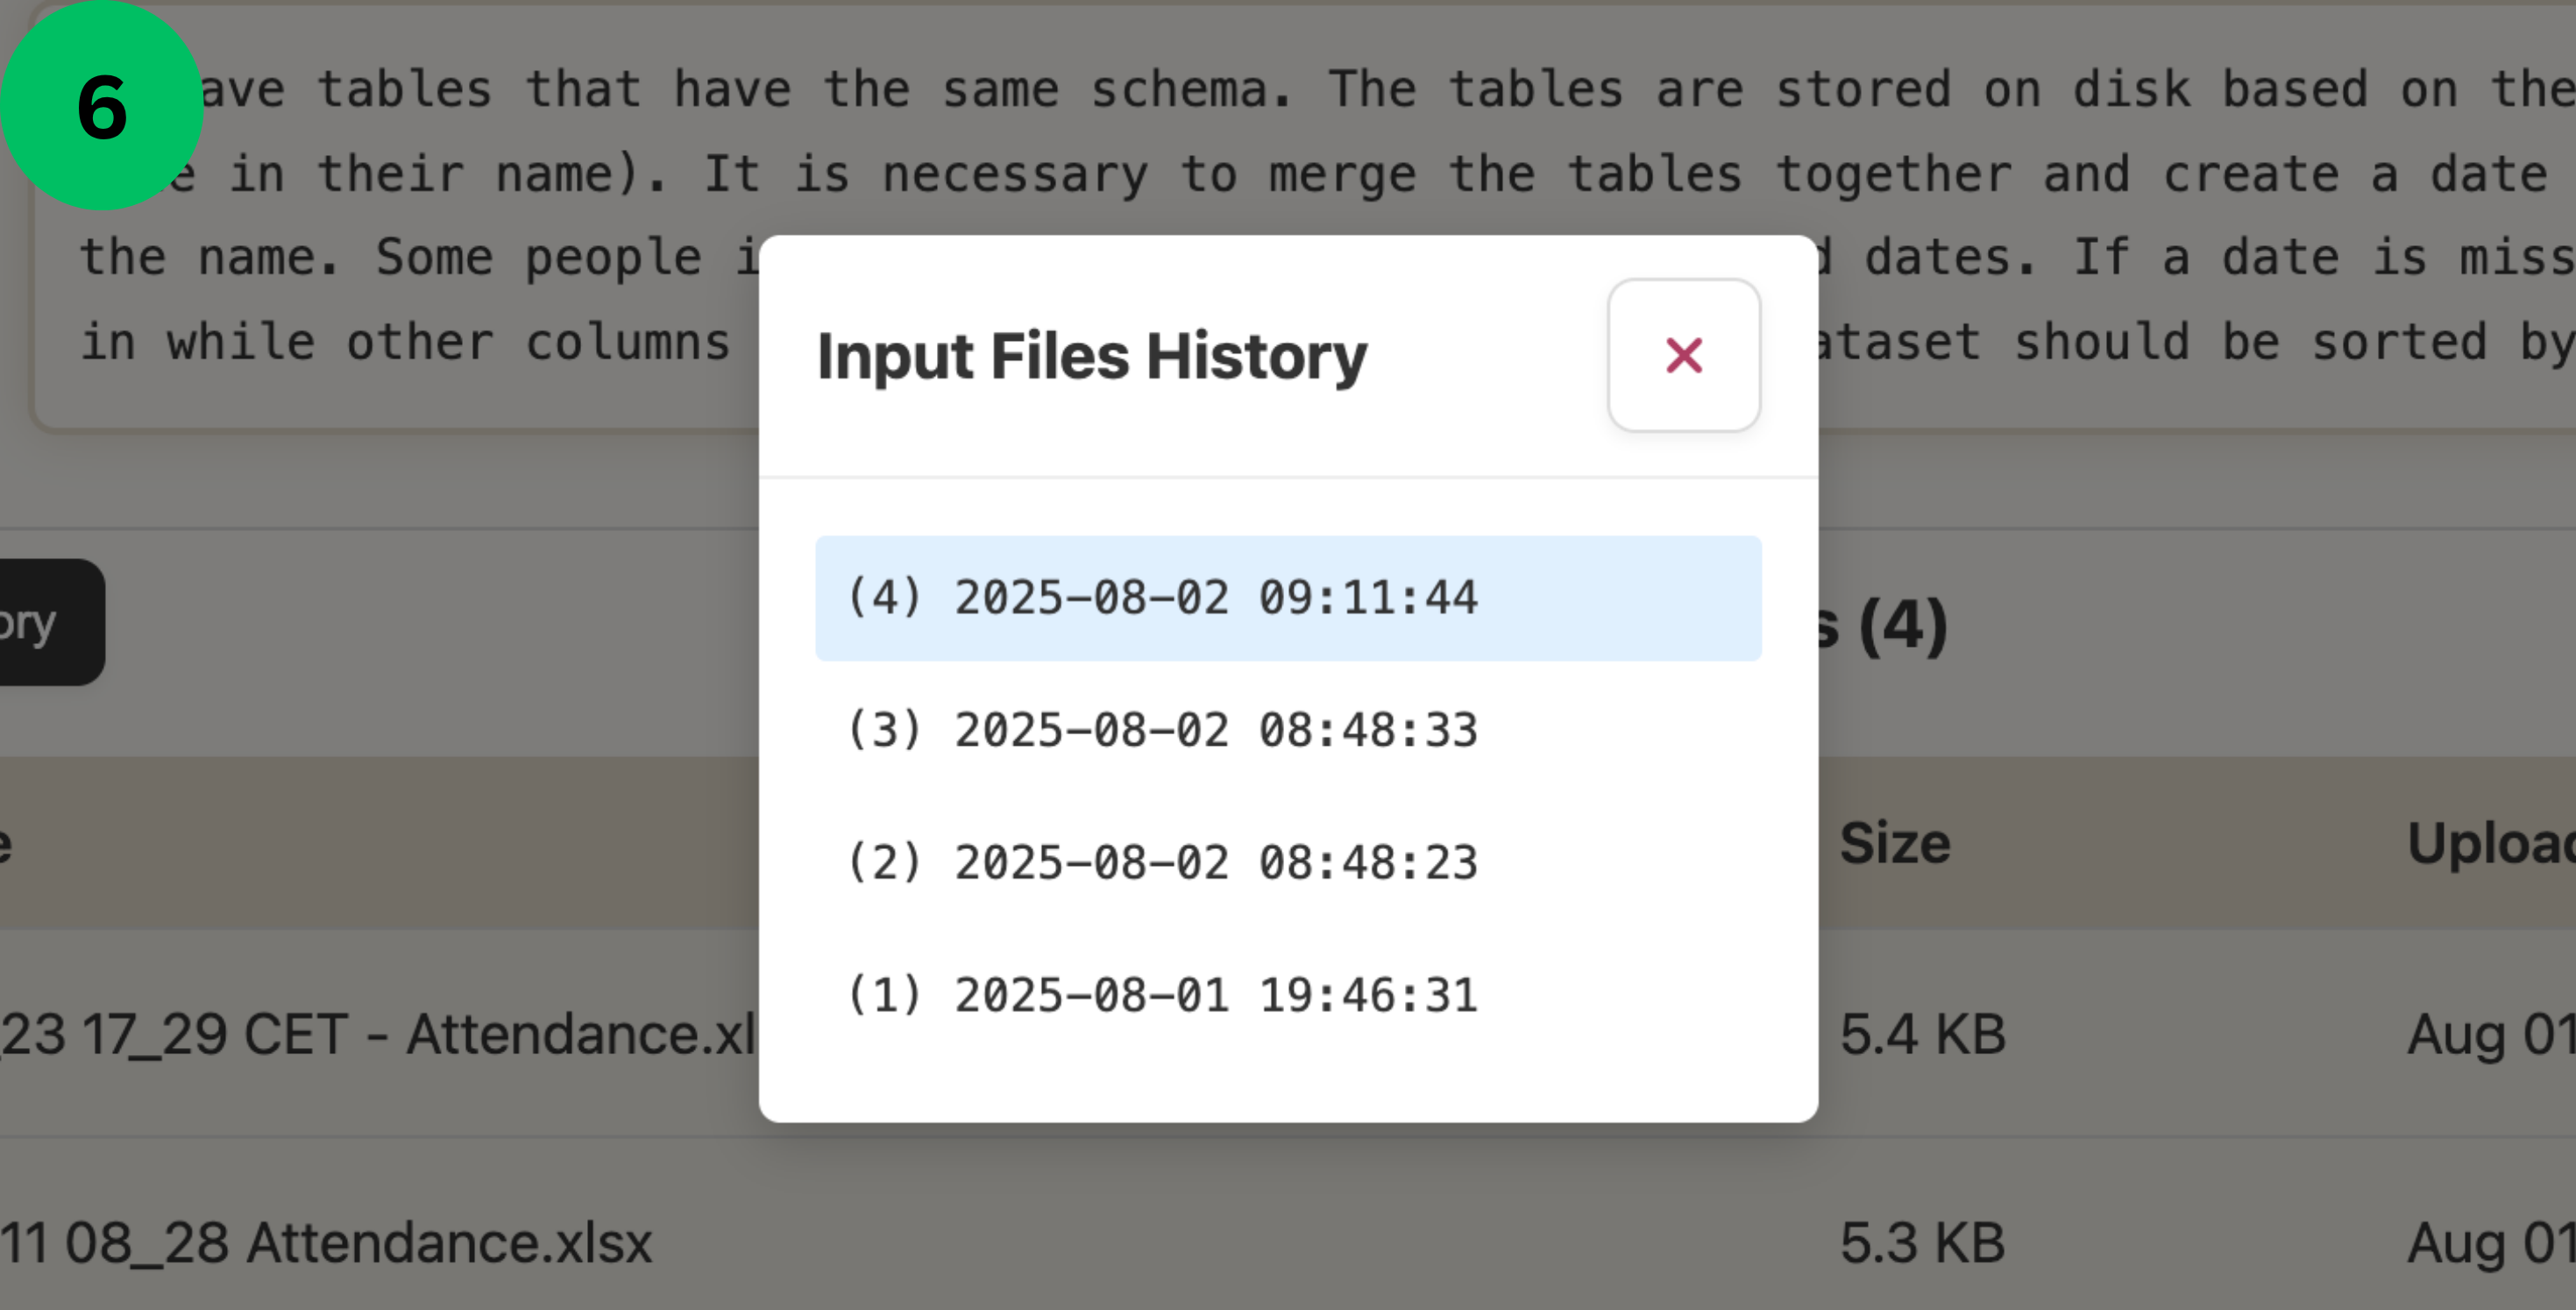
- Review the input data files used for your current instructions. You can run the same instructions multiple times with different input files - each instruction set can have multiple execution runs.
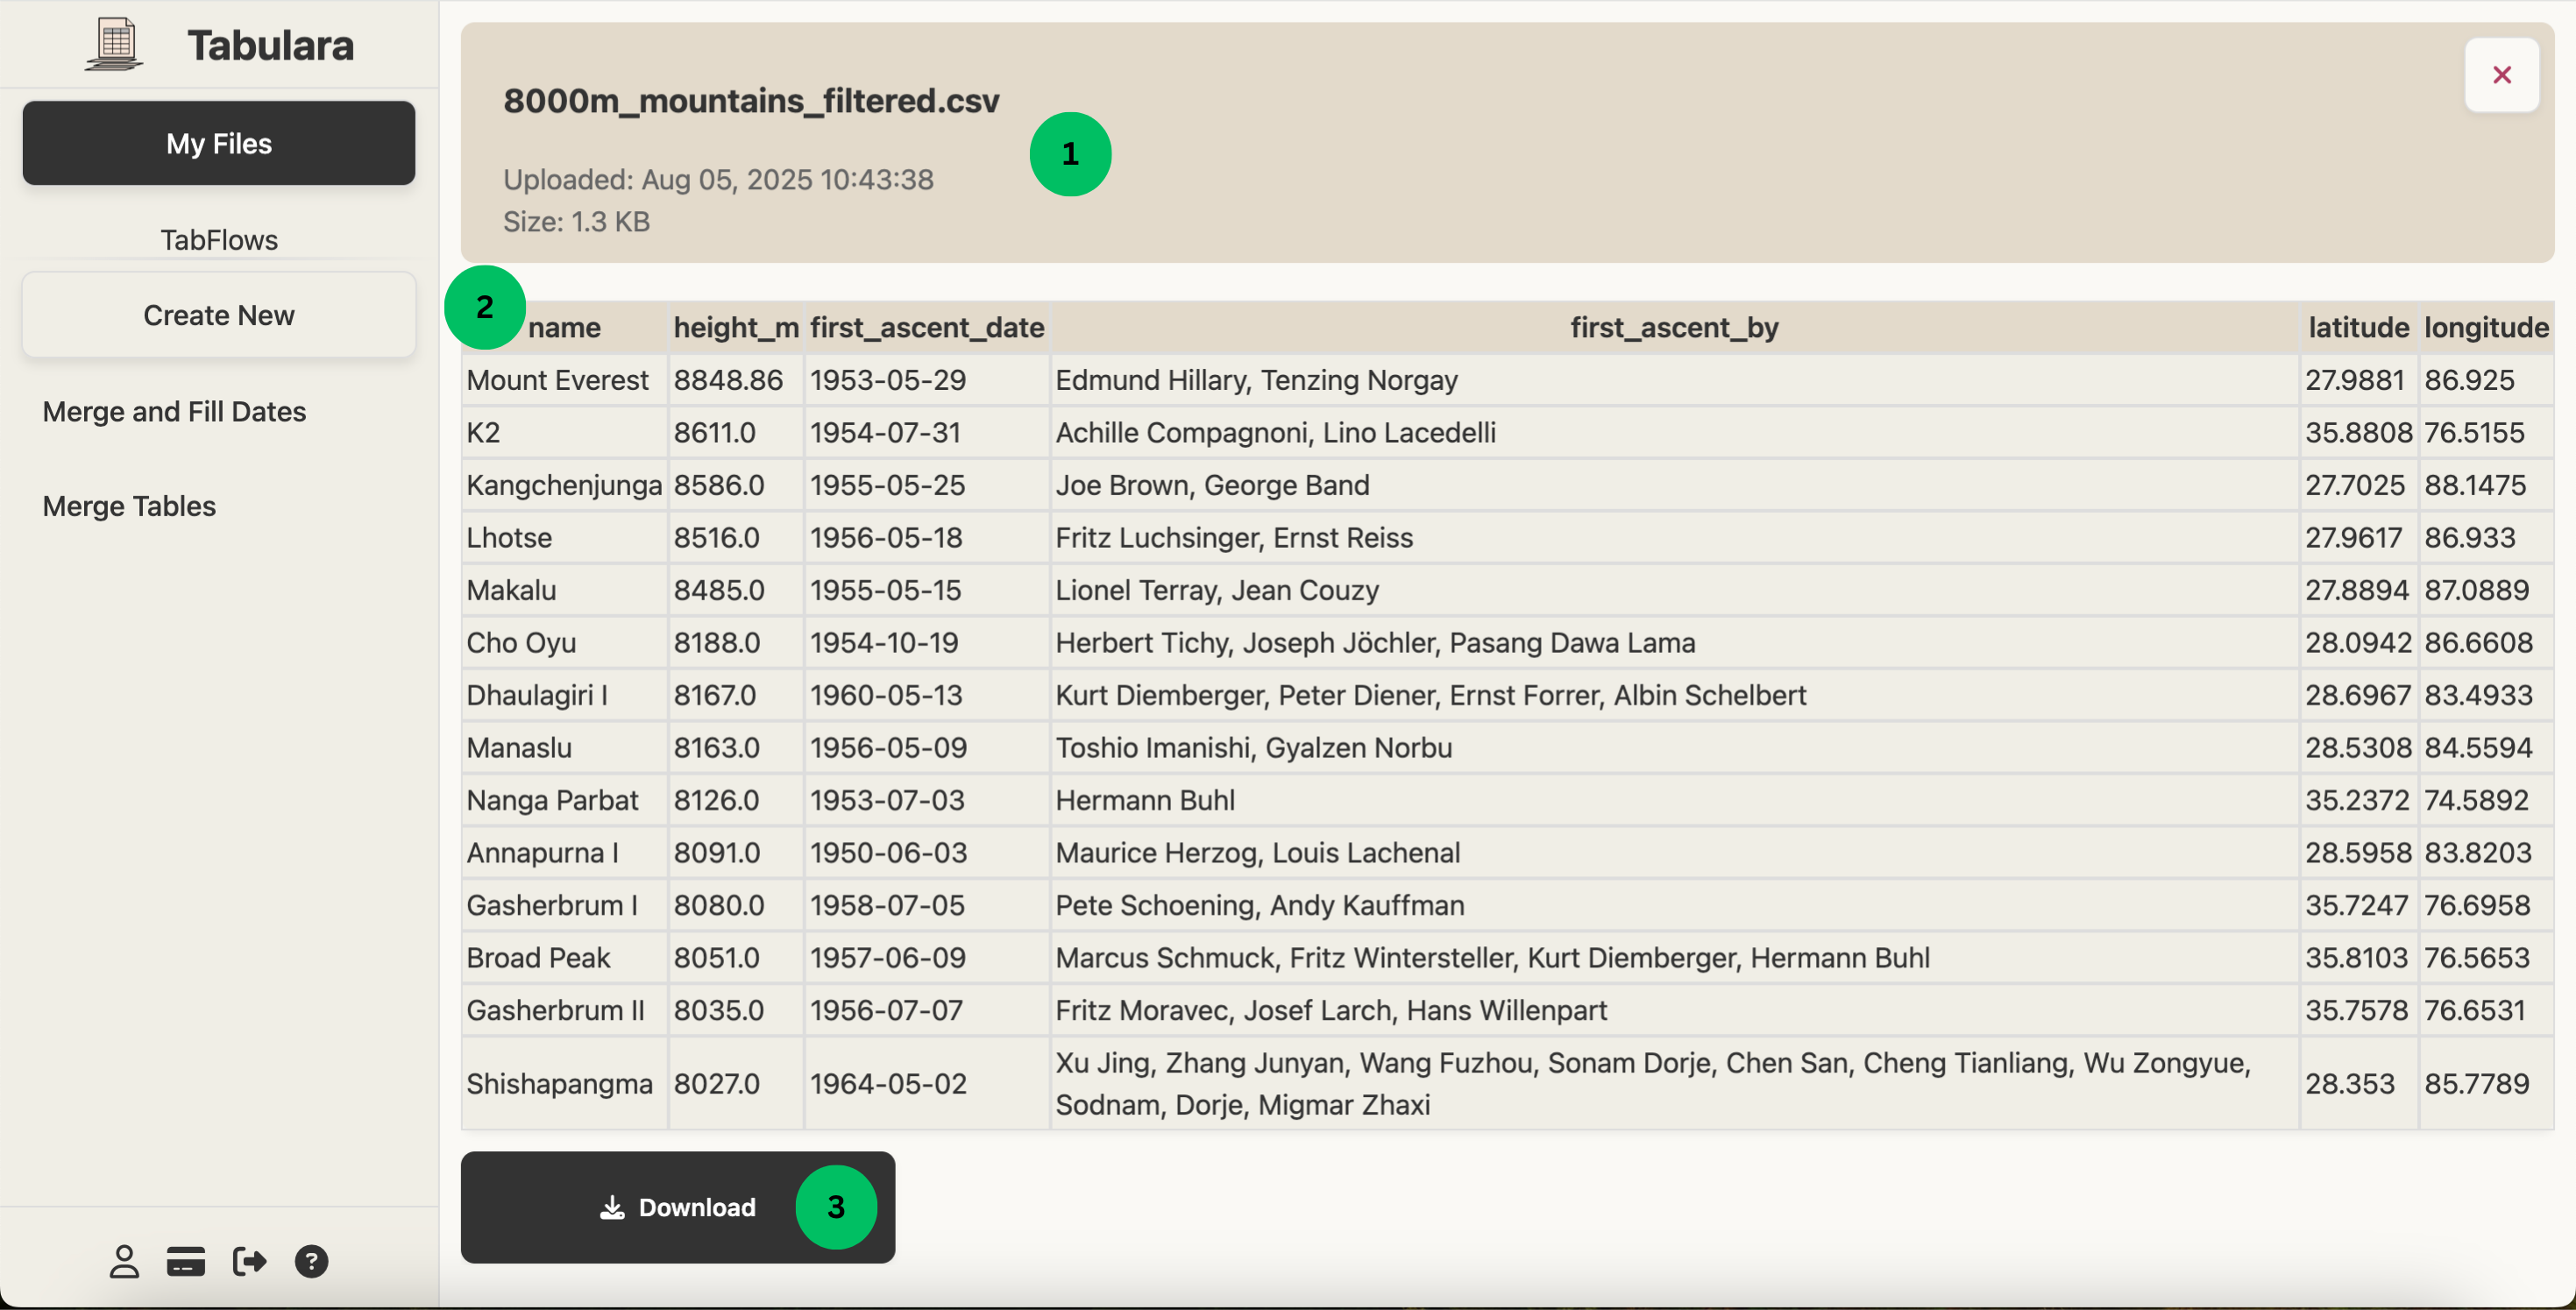
- Access your TabFlow results in this section. Check the output type, execution status, and detailed results of each run. Click to the result details icon to view comprehensive result details.
- Browse through all versions of your instructions. Switch between different instruction versions to compare or revert to previous iterations.
- View the complete execution history of your TabFlow instructions. Switch between different runs to compare results and track your progress.
- Click the Change Input Files button to execute this TabFlow instructions with a different set of input data files. This allows you to reuse the same processing instructions with new data - see the Repeated runs section for detailed instructions.
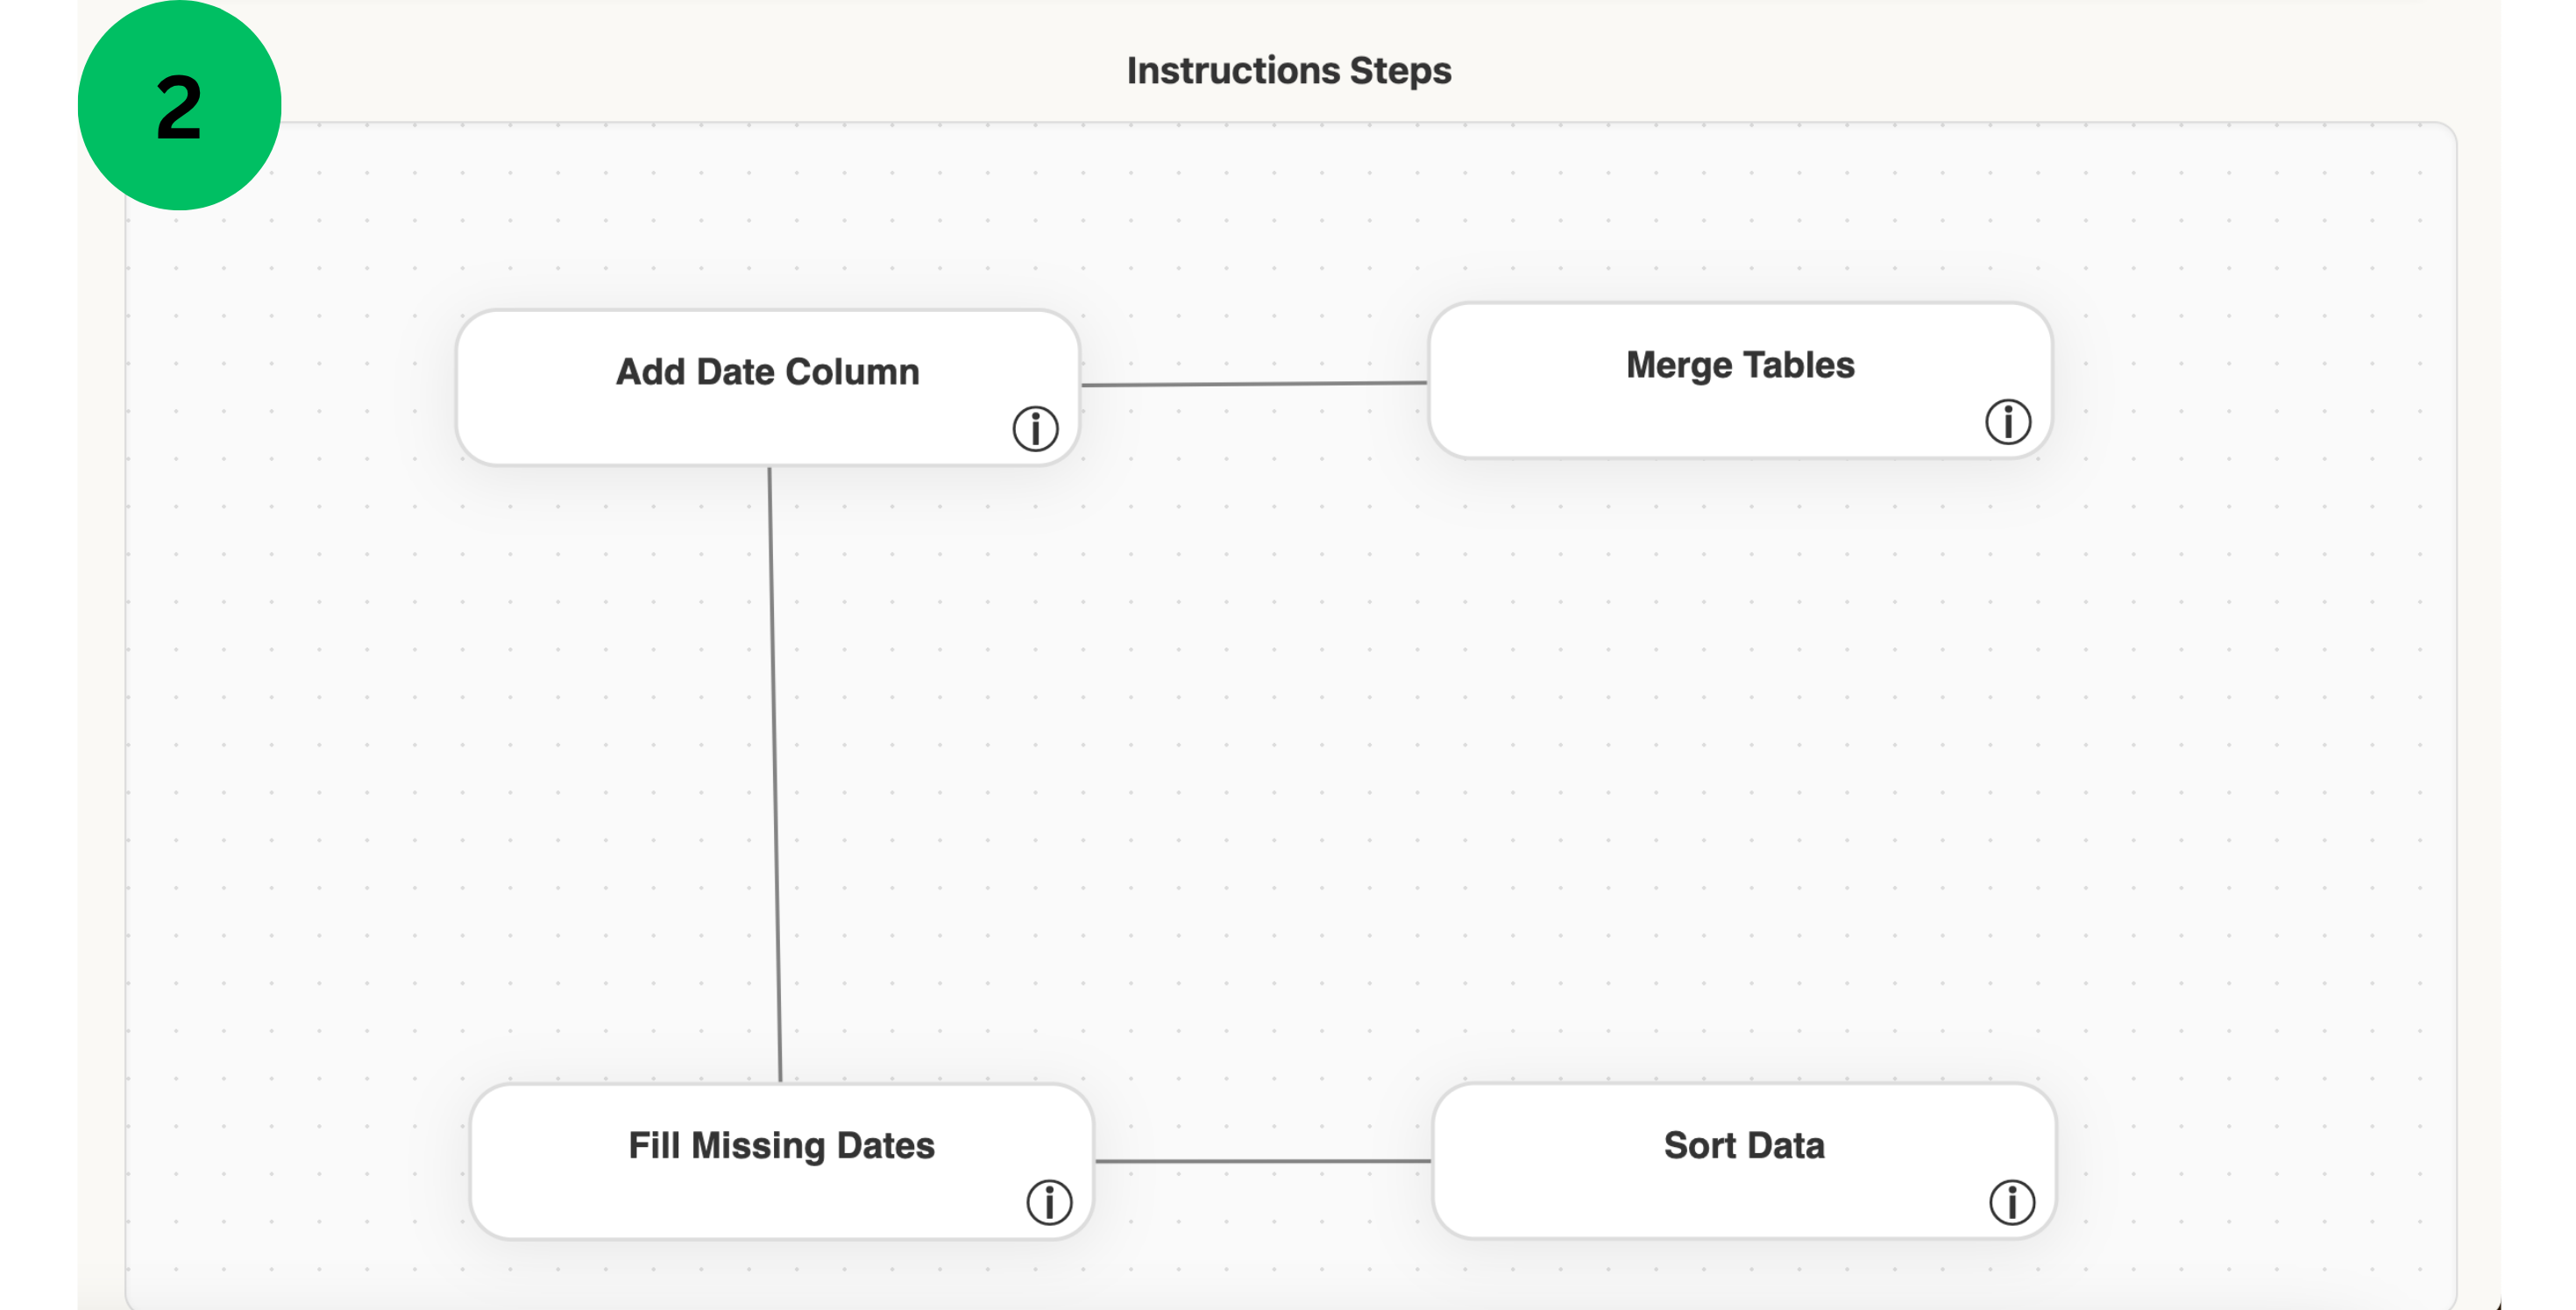
Tabflow Instructions steps
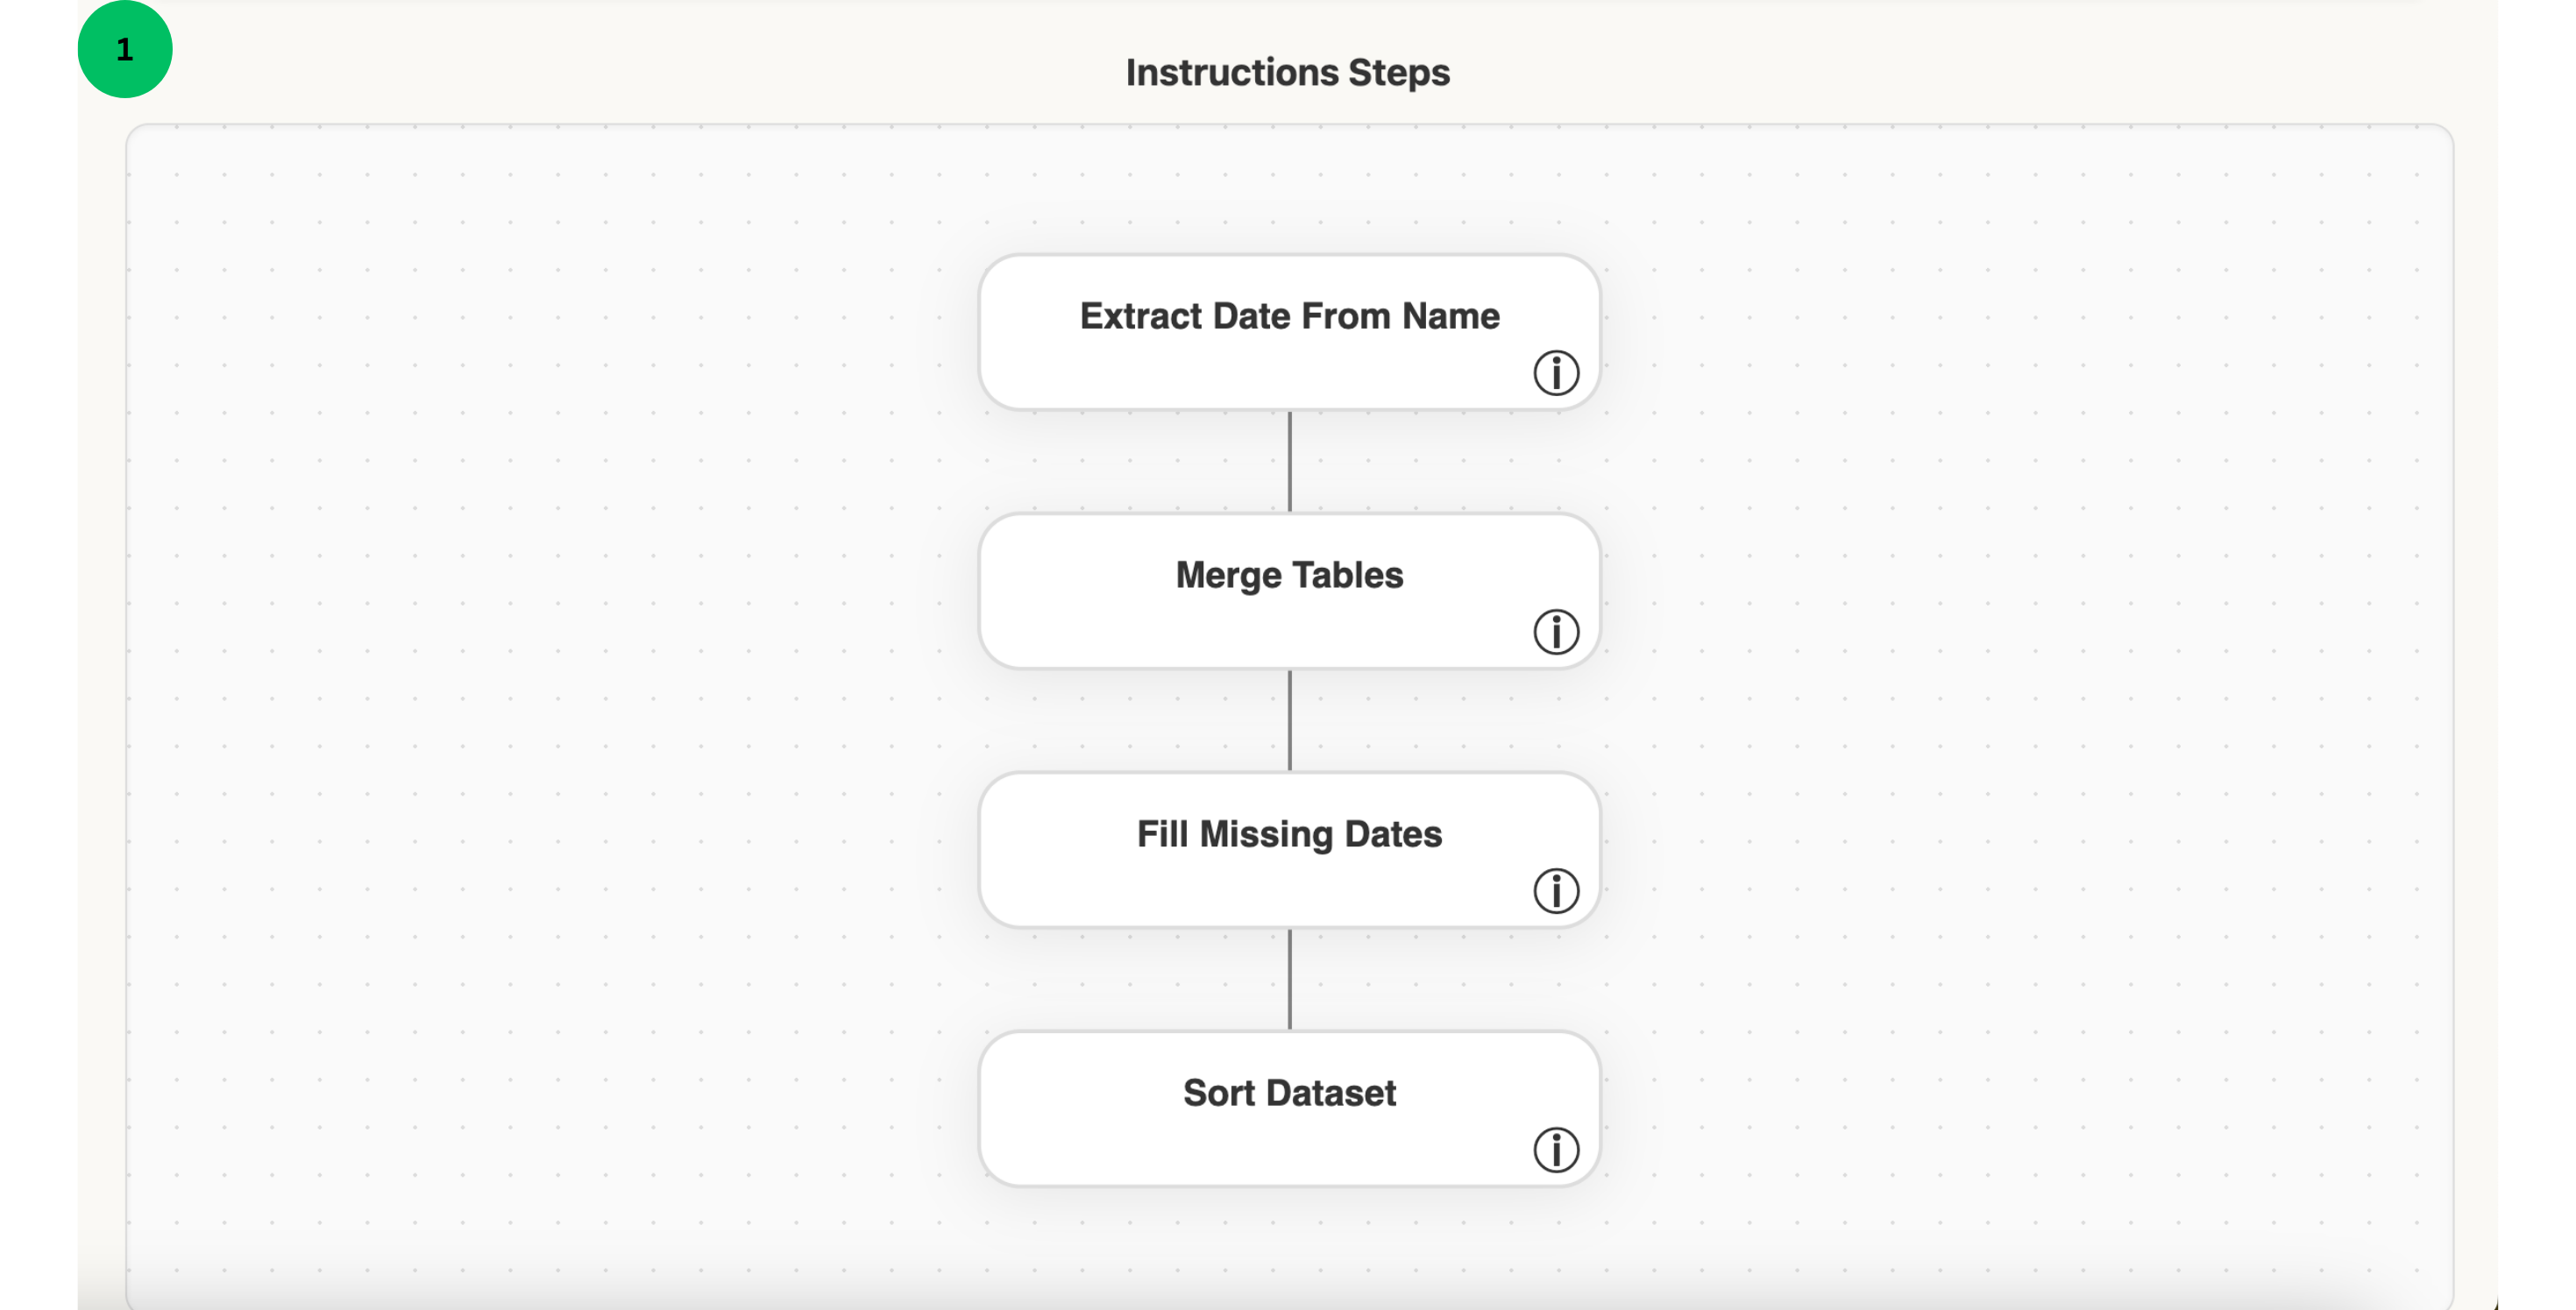
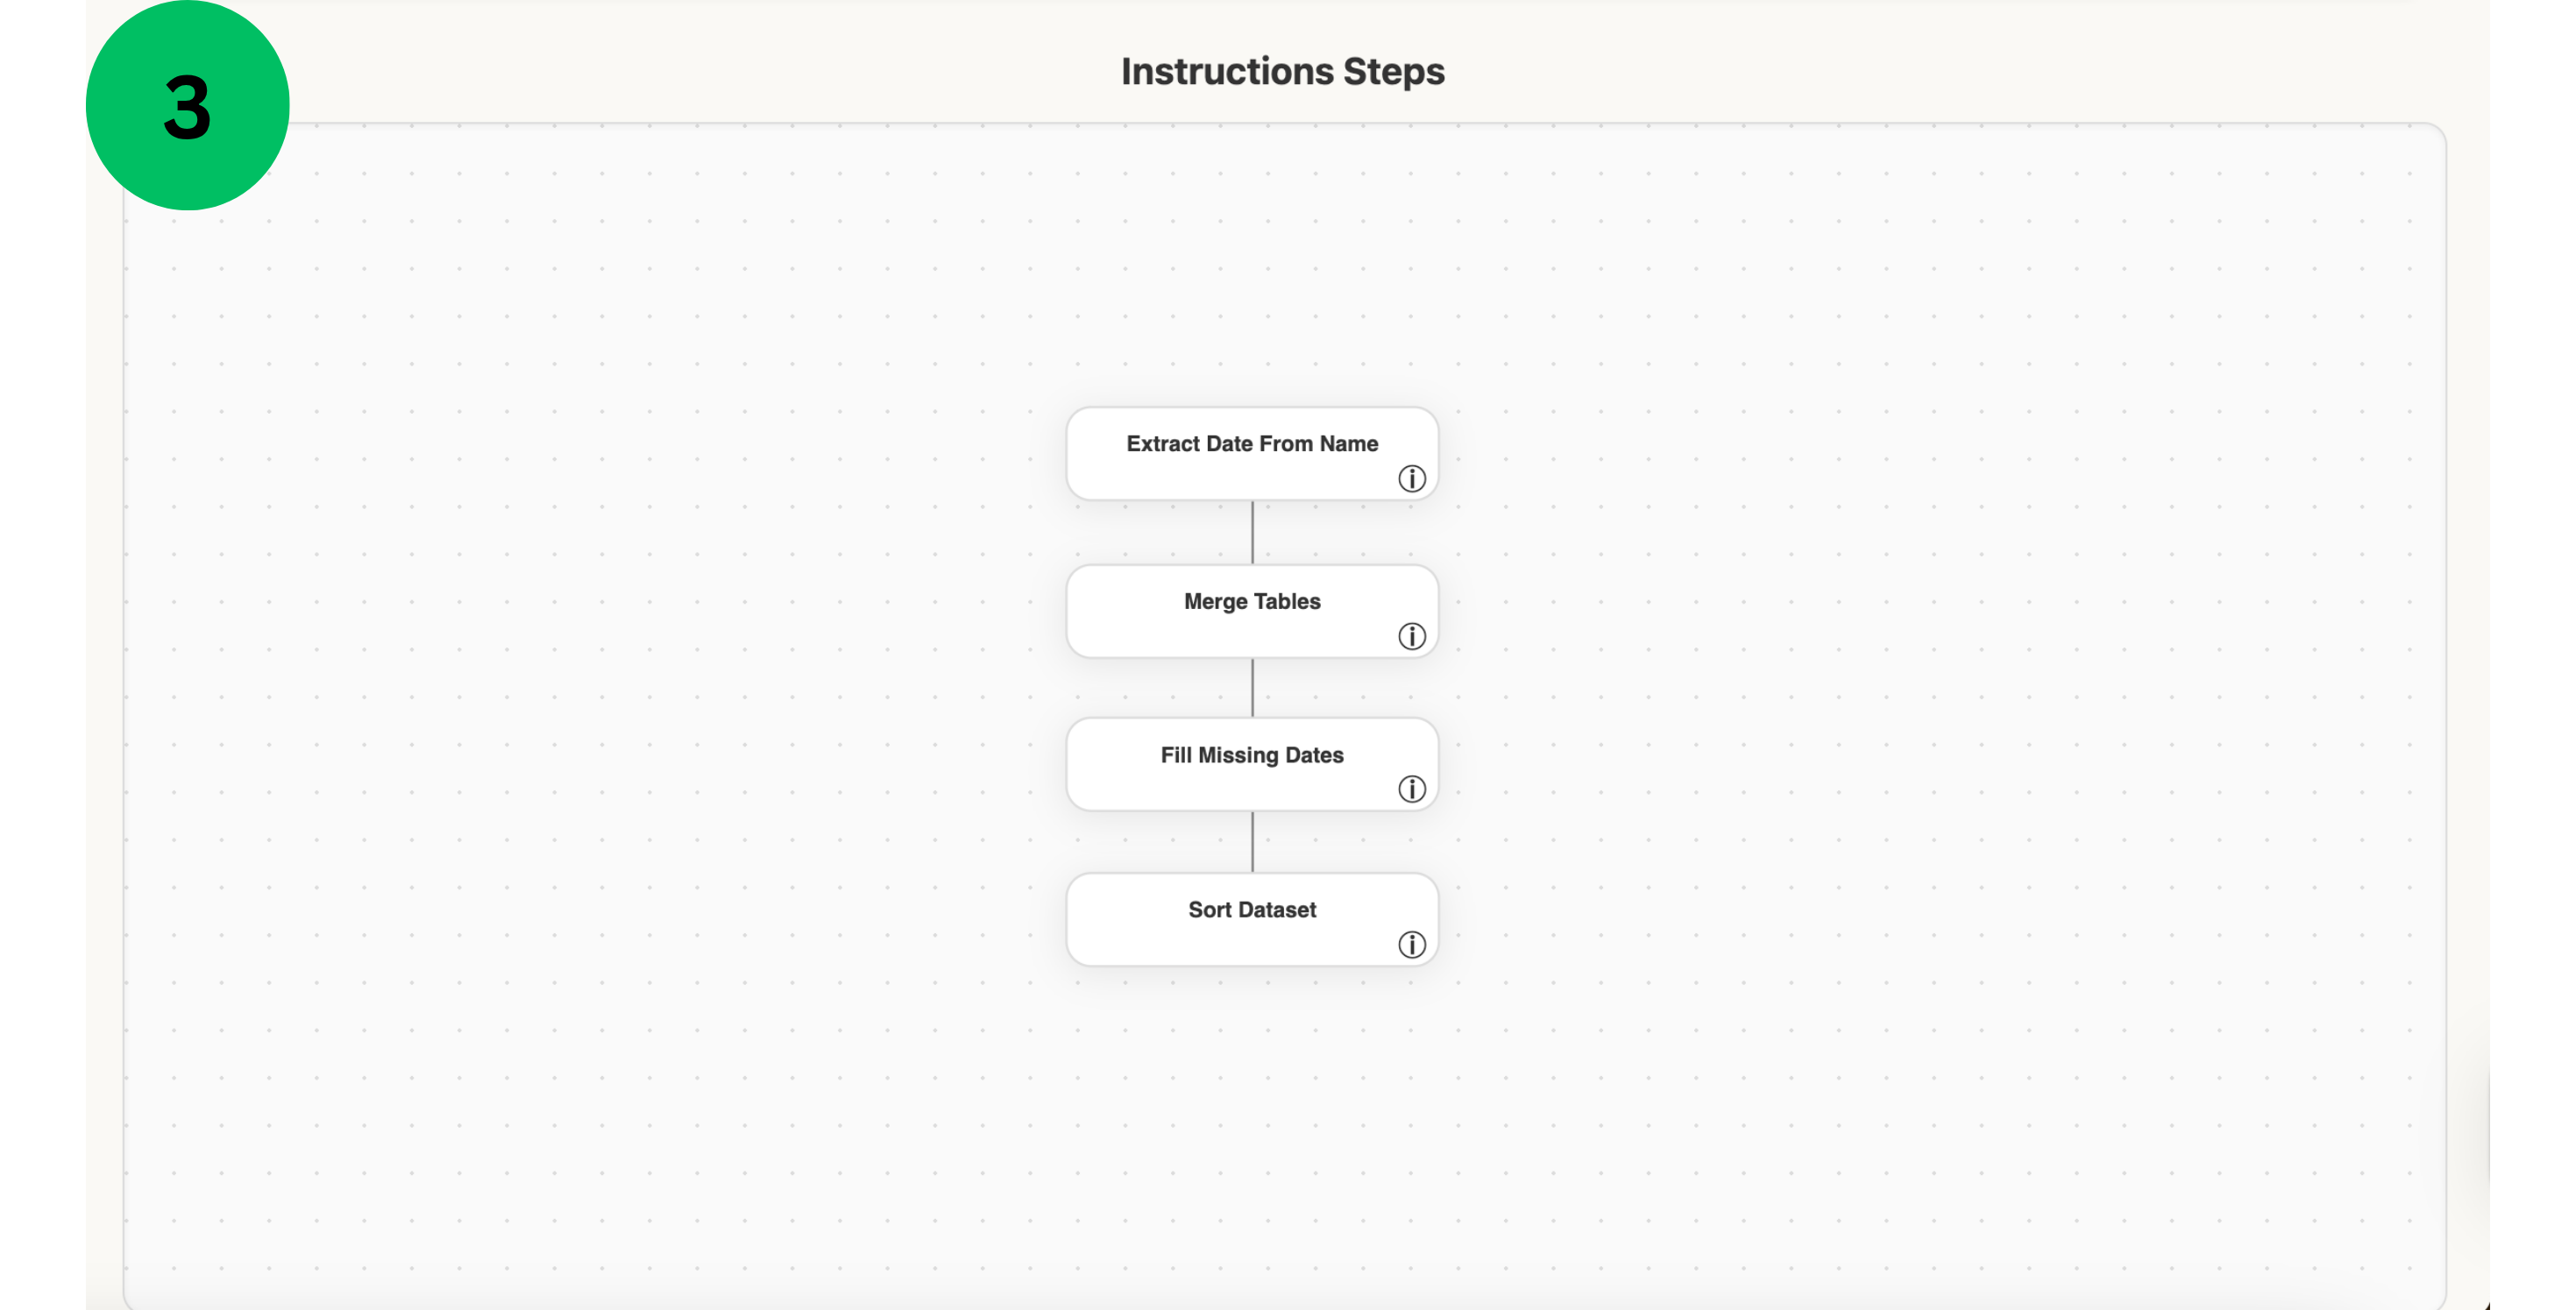
- View the graphical representation of your TabFlow instruction steps in this interactive diagram. Click the info button on any step to see detailed information including step name, description, and output data.
- Rearrange the visual layout by clicking and dragging individual steps to new positions. Double-click anywhere on the graph area to automatically center and reposition the diagram.
- Control the zoom level by holding the Shift key while scrolling with your mouse wheel - scroll up to zoom in for detail or scroll down to zoom out for an overview.
Repeated runs
- The graphical interface is similar to the Create a Tabflow section, but with a key difference: your instructions have already been compiled into Python code and processing steps. Simply select your input files and Re-run the existing workflow with new data.
- Click the Start button to execute the workflow with your selected input files. Important: Ensure your new input data has the same structure (column names, data types) as the original files used during instruction compilation, or the execution may fail or produce unexpected results.